Introduction
First Steps with Structr
This guide walks you through typical steps of building an application using Structr’s visual development tools.
The use case is a simple system for managing projects, milestones and tasks. We’ll start with the schema, add some sample data and create a web page to display the data.
As an optional addition, we add a user and a group, define API access permissions and a CORS rules.
Chapter 1: Defining the Data Schema
Start by creating the data structure for your project management system. The schema defines three main entities:
- Projects
- Milestones
- Tasks
Creating the Project Type
Navigate to the “Schema” view and click “Create Data Type” to add your first entity type.
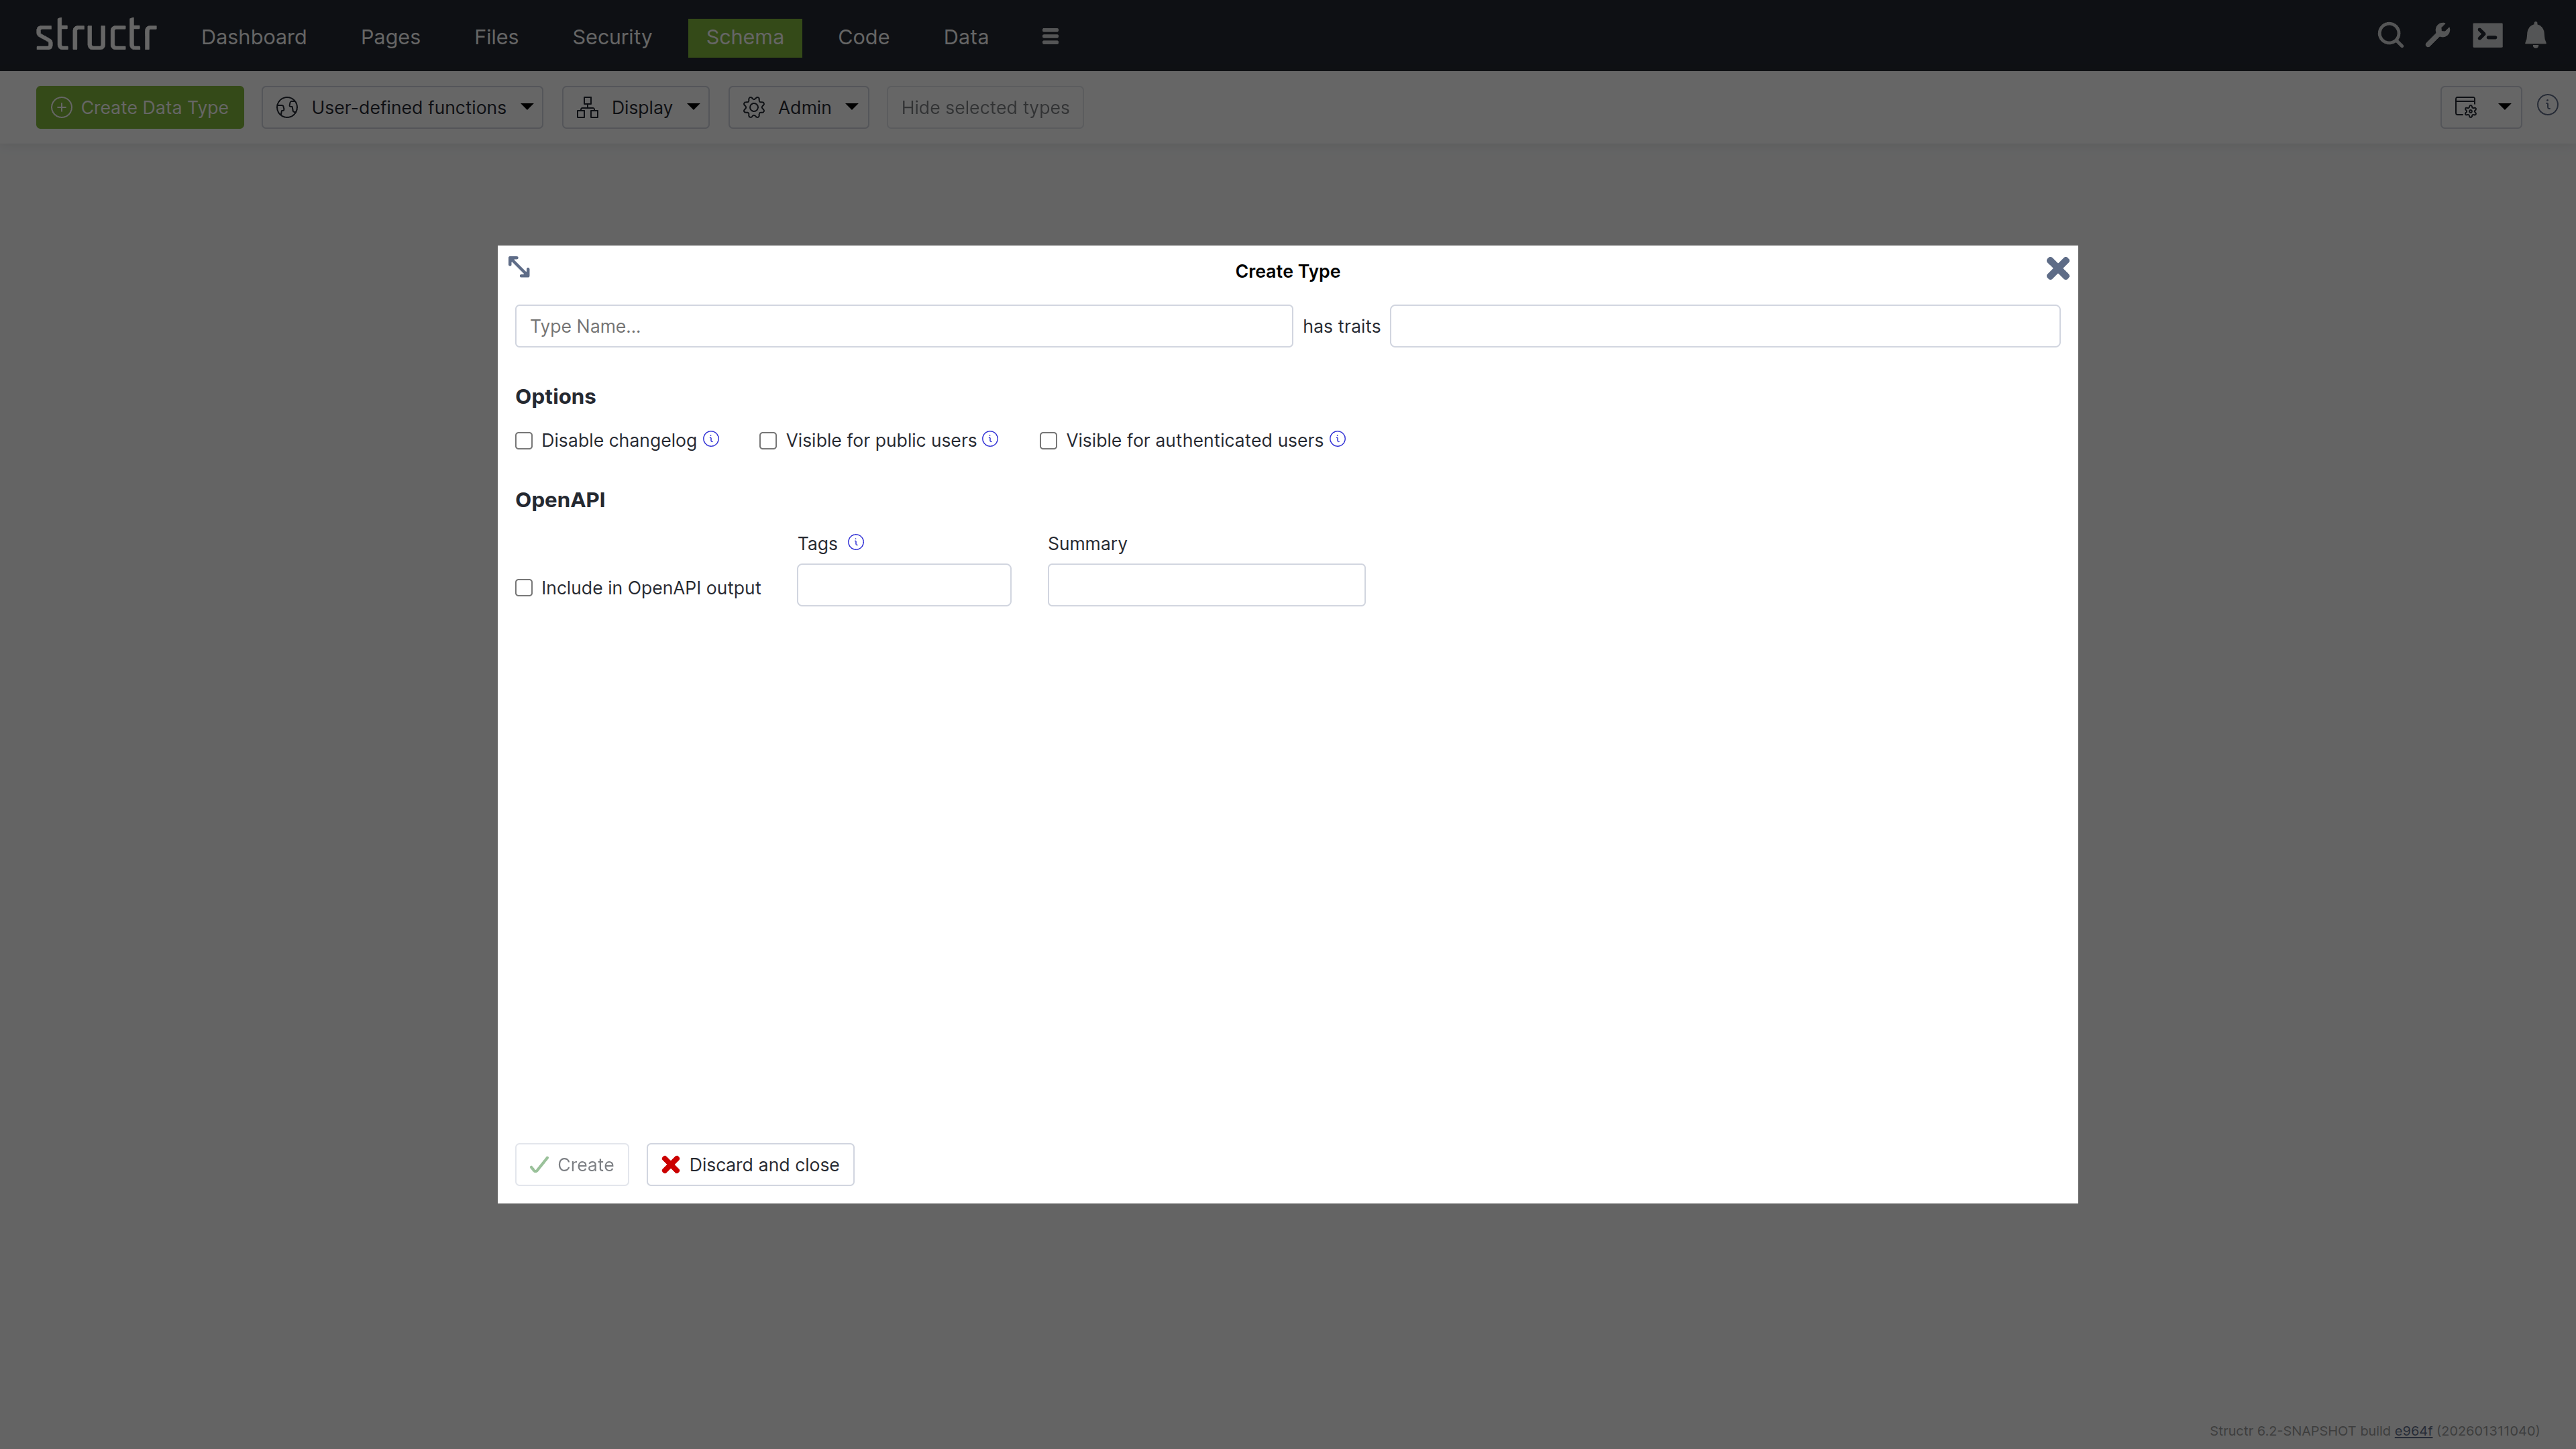
- Enter “Project” as the type name
- Click “Create” to add the type
Add a custom property to uniquely identify projects:
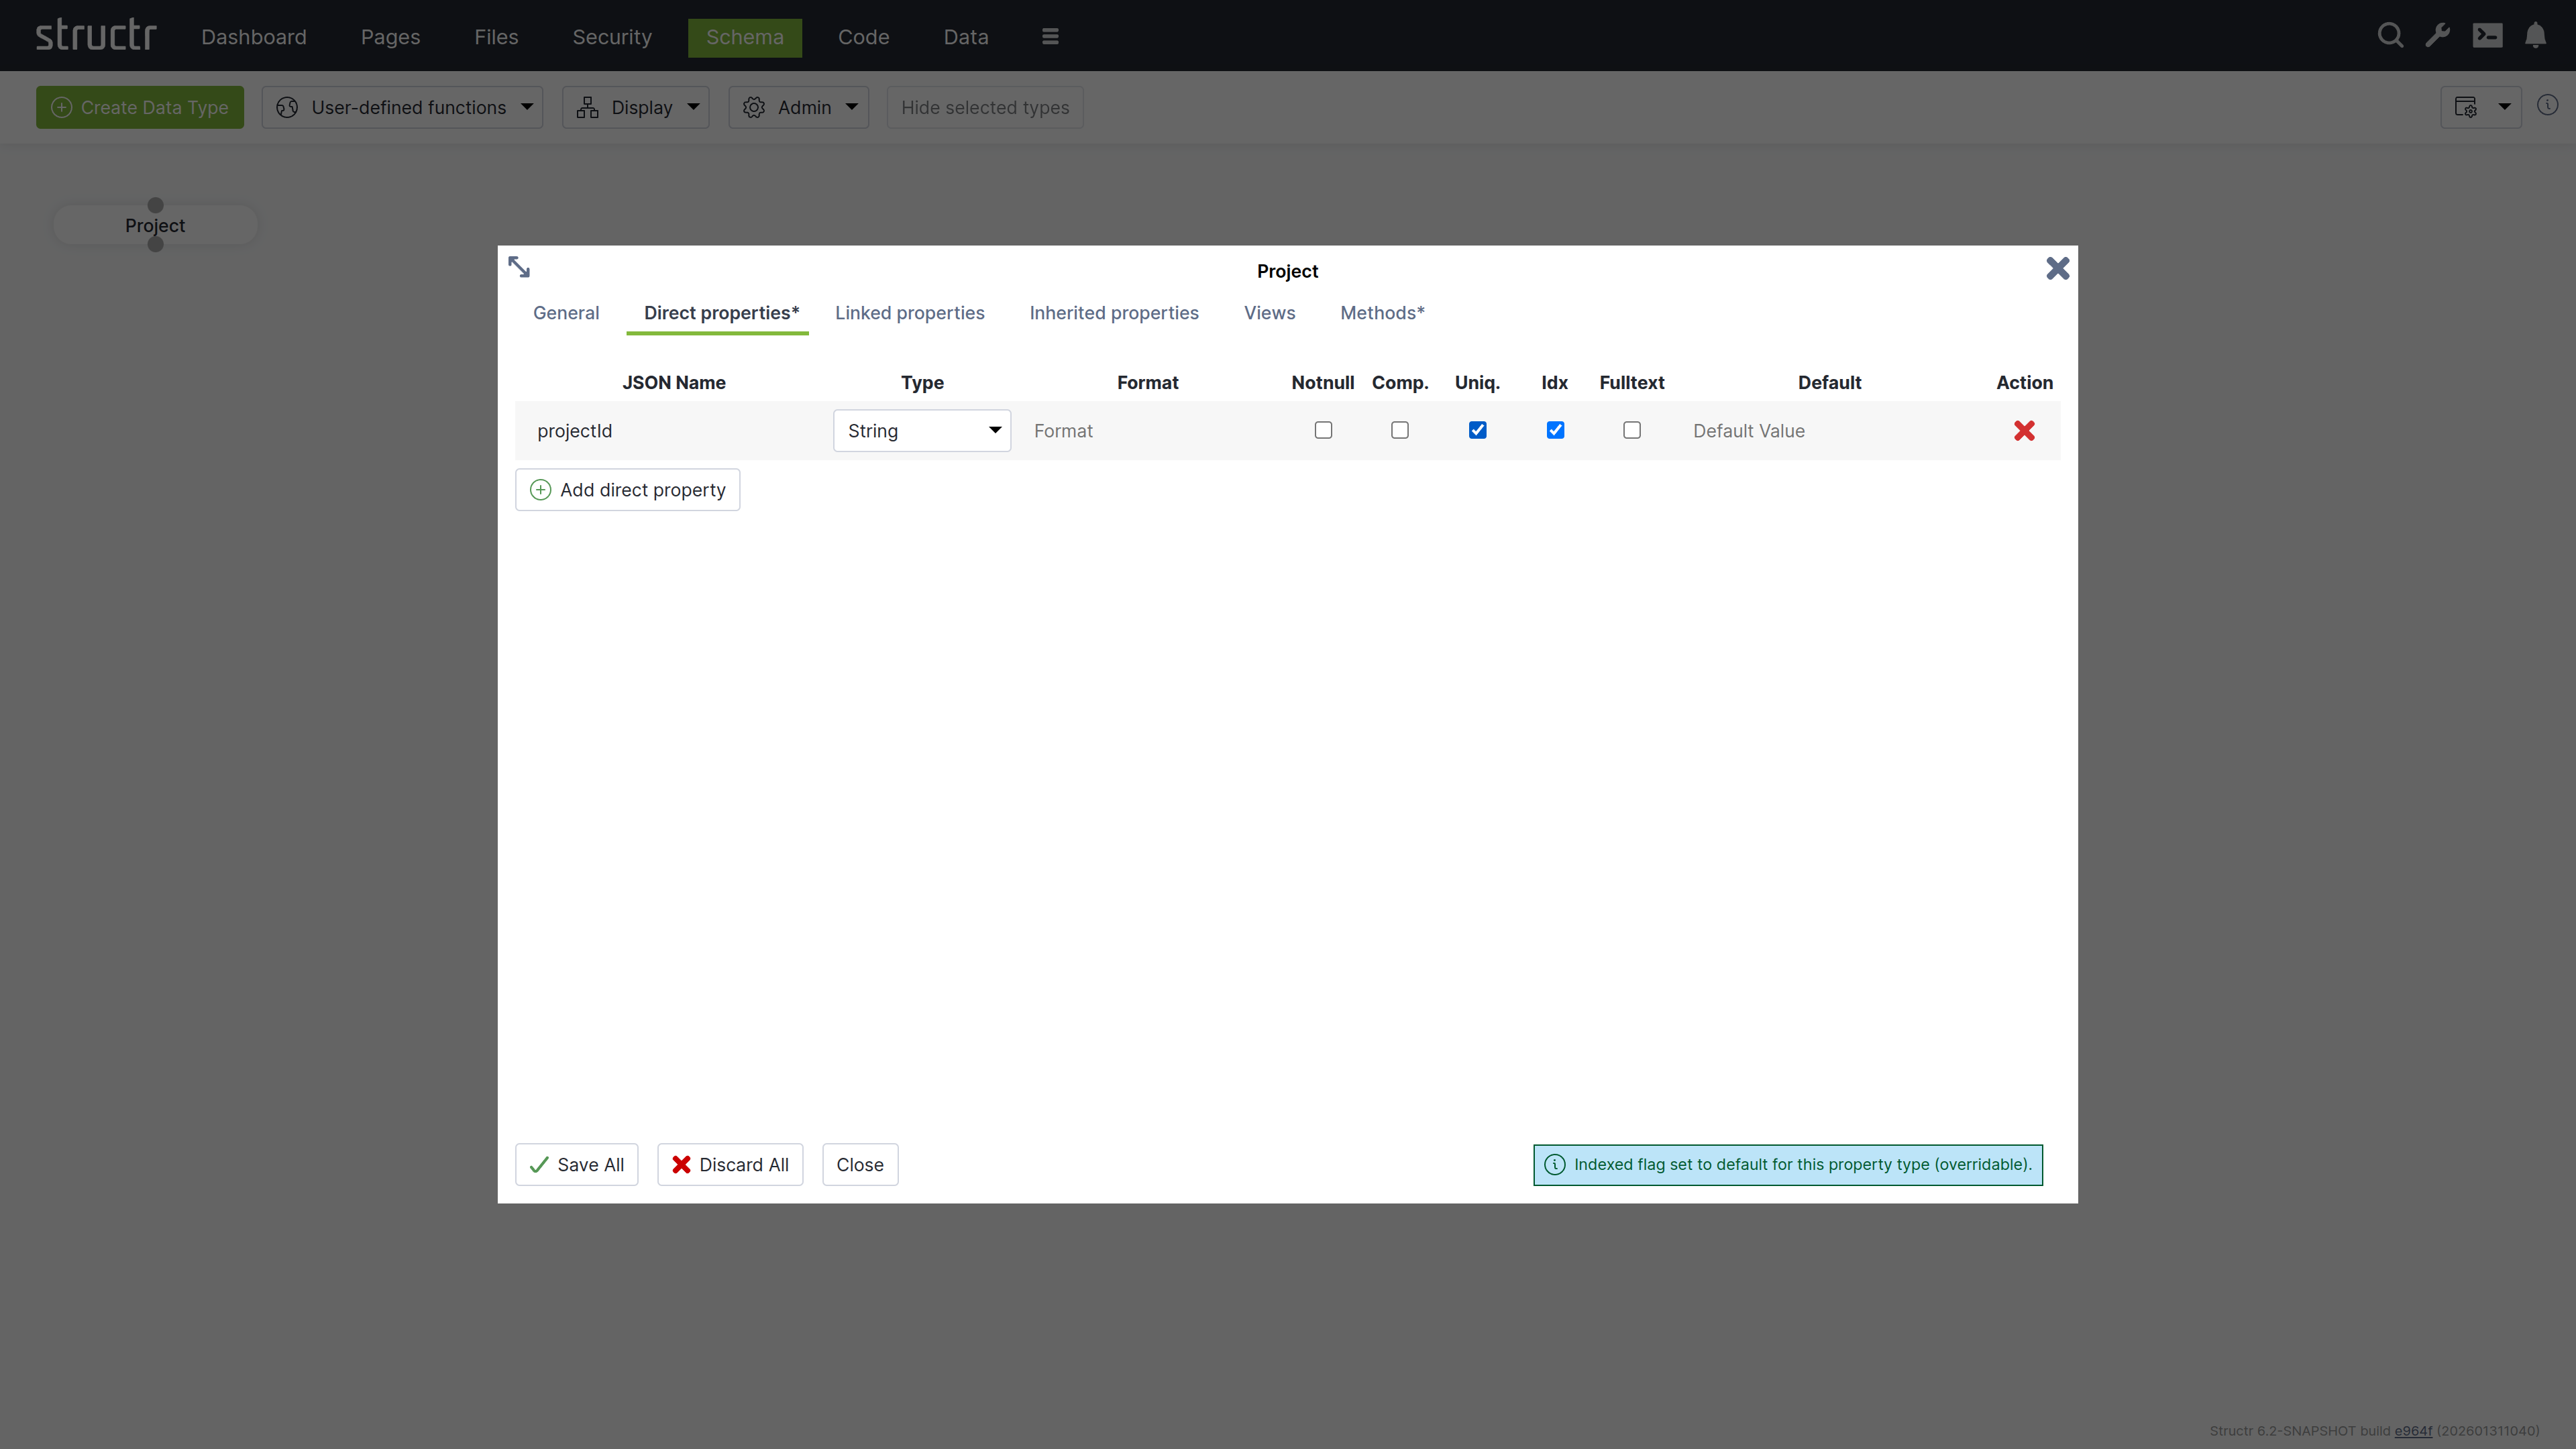
- Expand “Direct properties”
- Click “Add direct property”
- Set JSON name to “projectId”
- Check “unique” to ensure each project has a unique identifier
- Select “String” as the property type
- Click “Save All”
Creating the Milestone Type
Add a Milestone type following the same pattern:
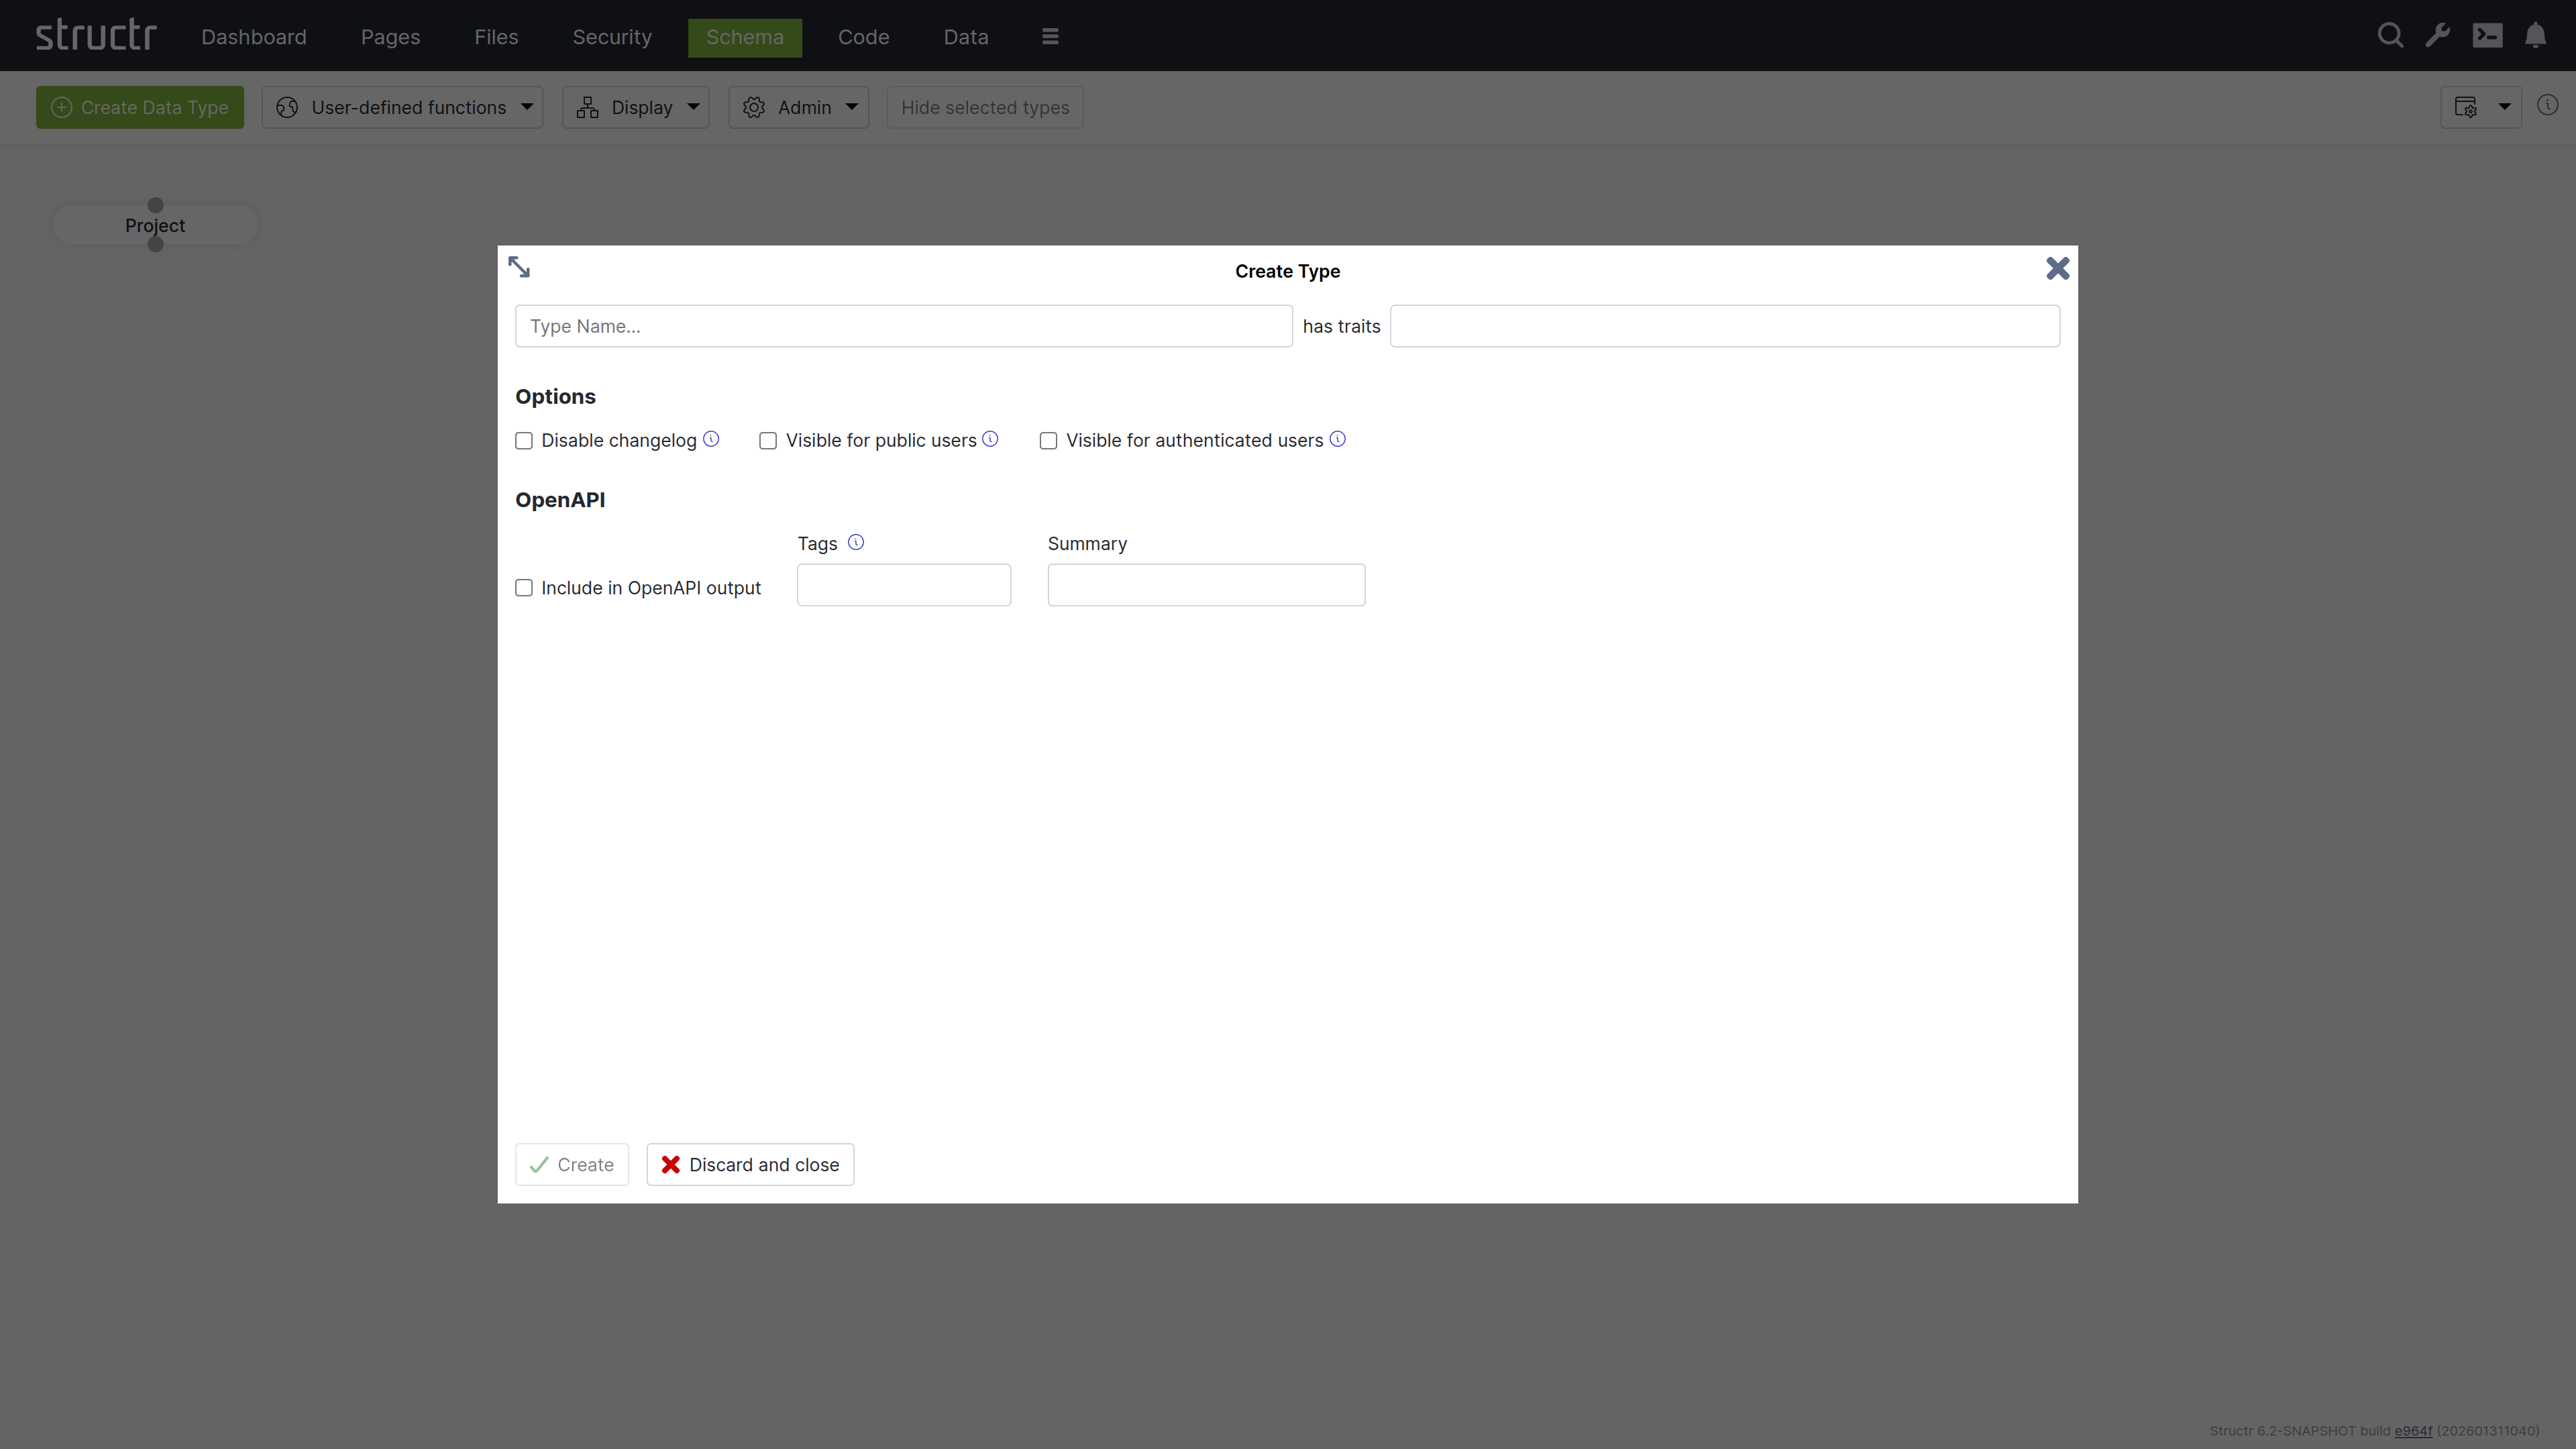
Add multiple properties to track milestone details:
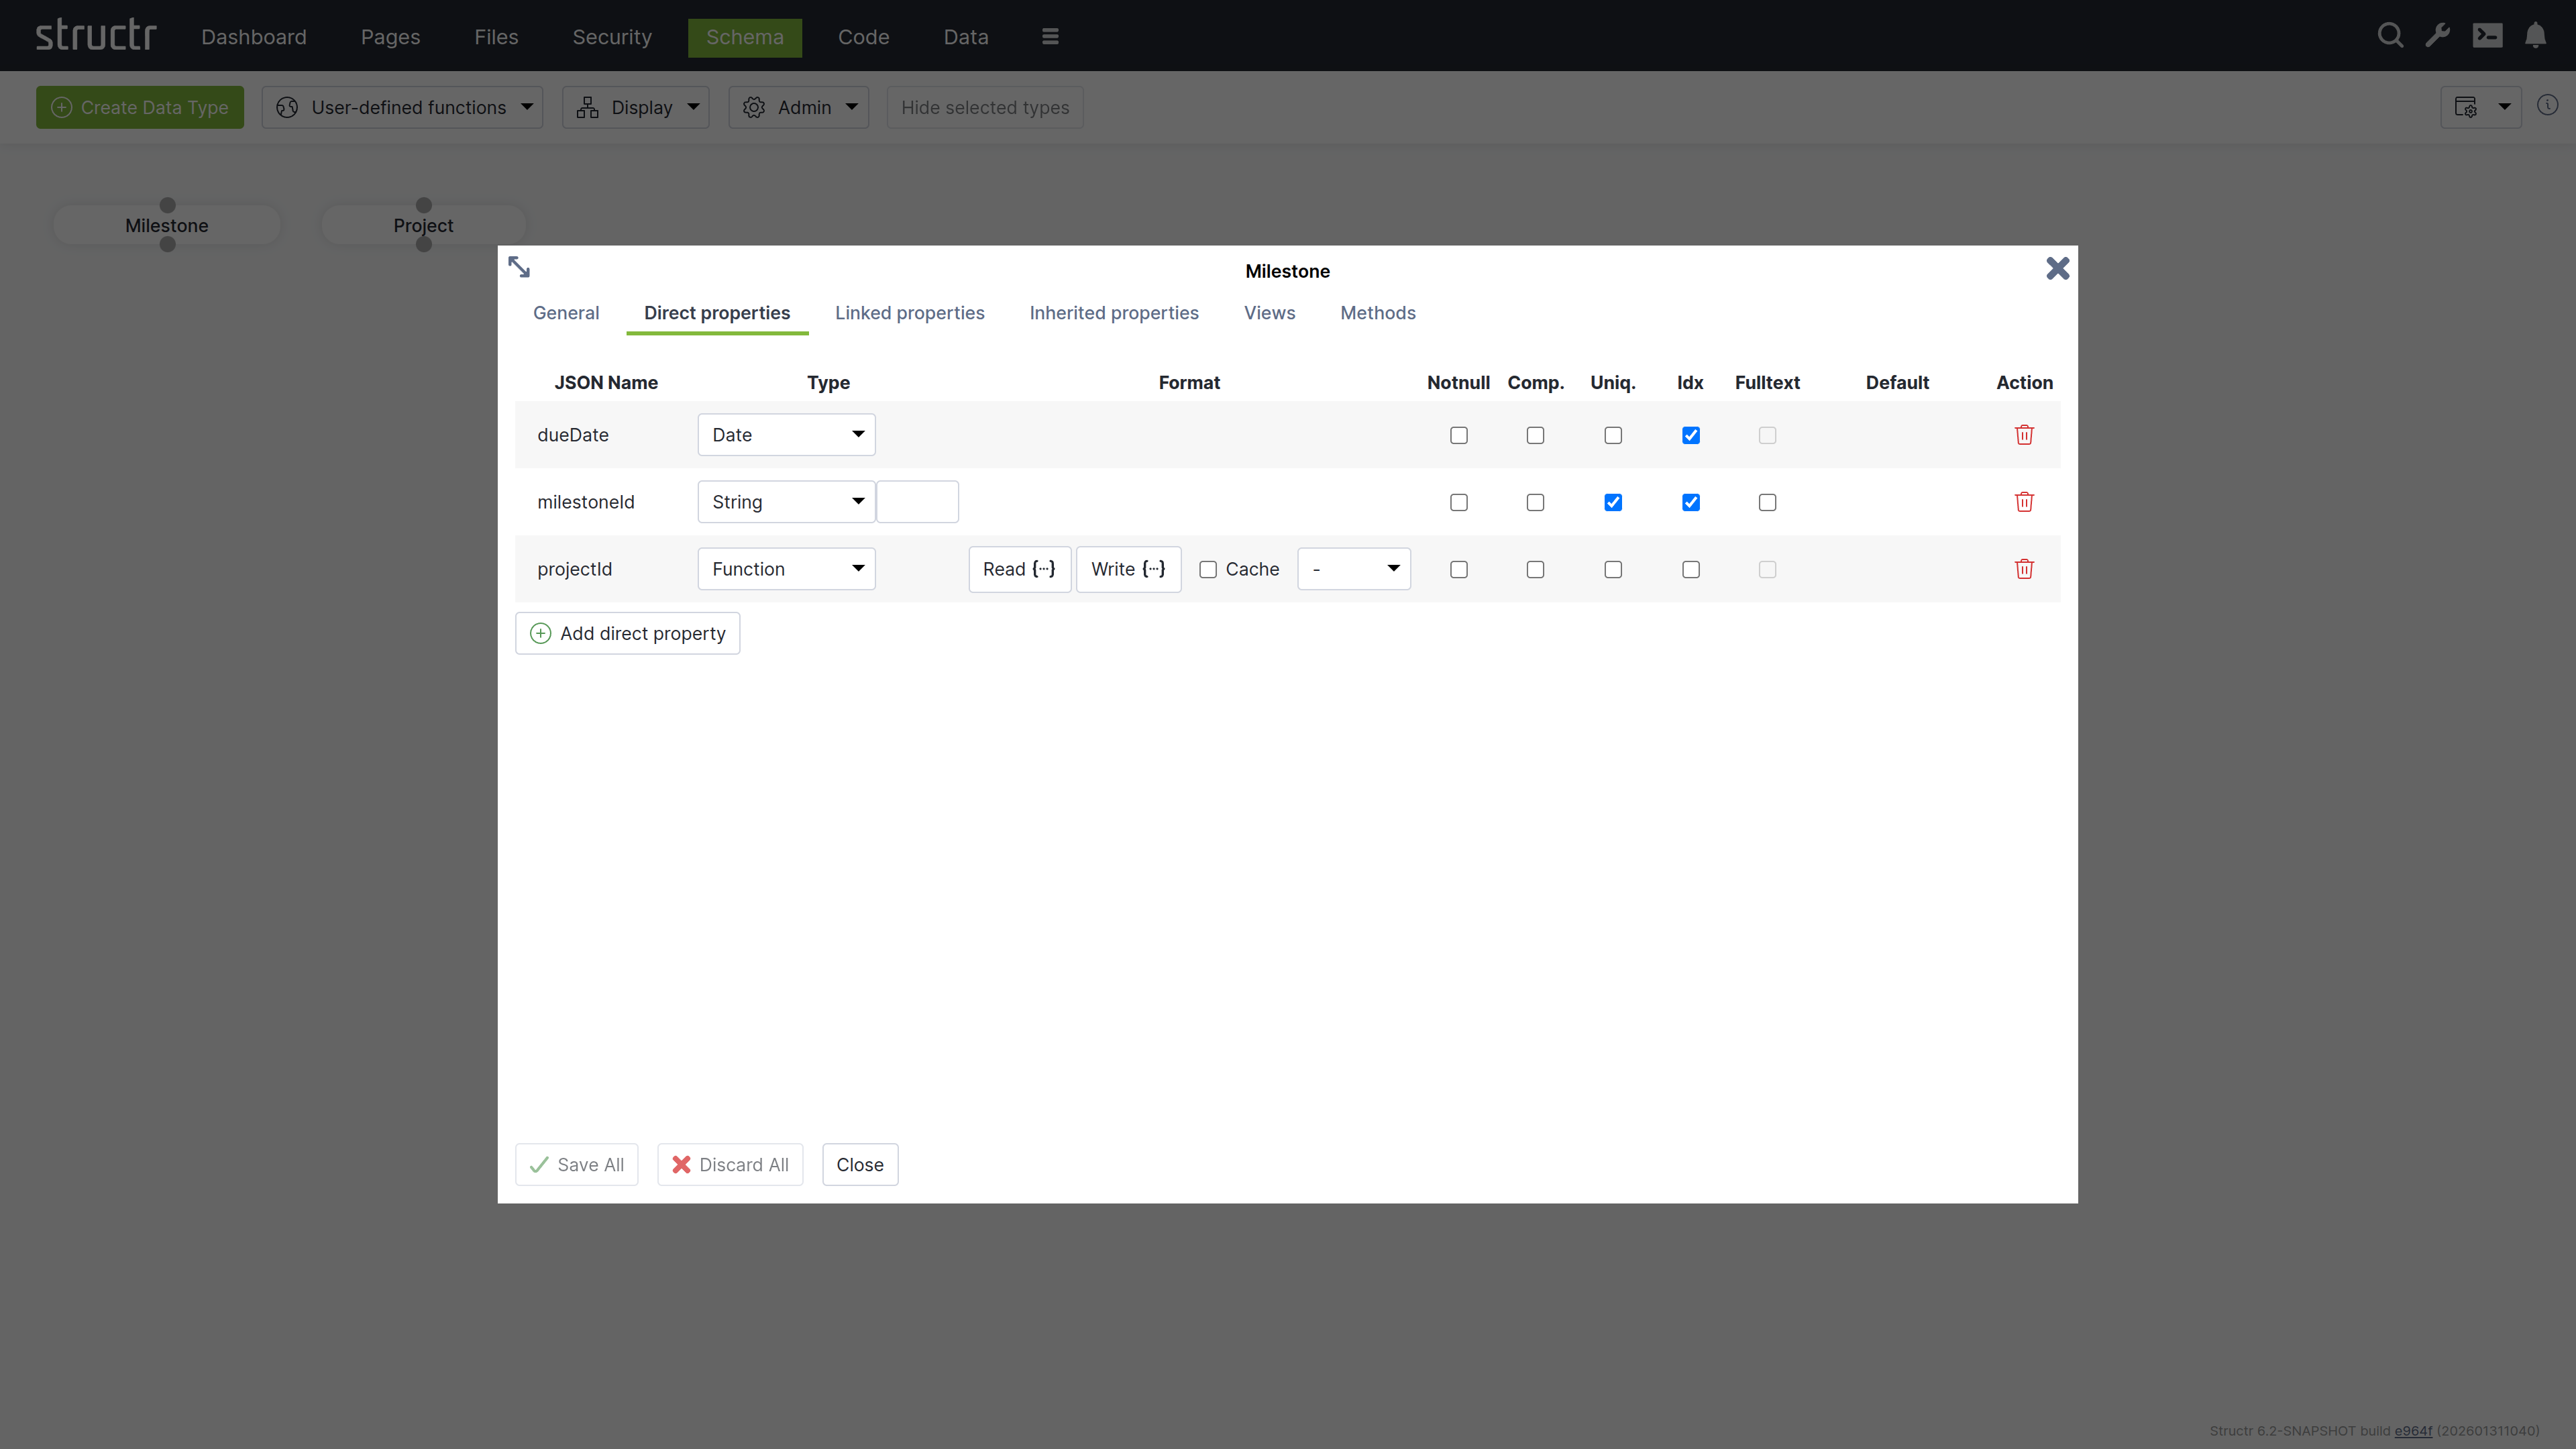
milestoneId: String property marked as uniquedueDate: Date property for deadline trackingprojectId: Function property that automatically links to the parent project
The Function property allows setting a Read and a Write function which are called when a value is read from or written to the property.
In our example, the Read function just returns the value of the projectId property of the connected project.
The Write function establishes a relationship between the Milestone object and the Project object referenced by the given value.
- Read:
this.project.projectId - Write:
set(this, 'project', first(find('Project', 'projectId', value)))
Defining Relationships
Connect your types by dragging from one connection point to another:
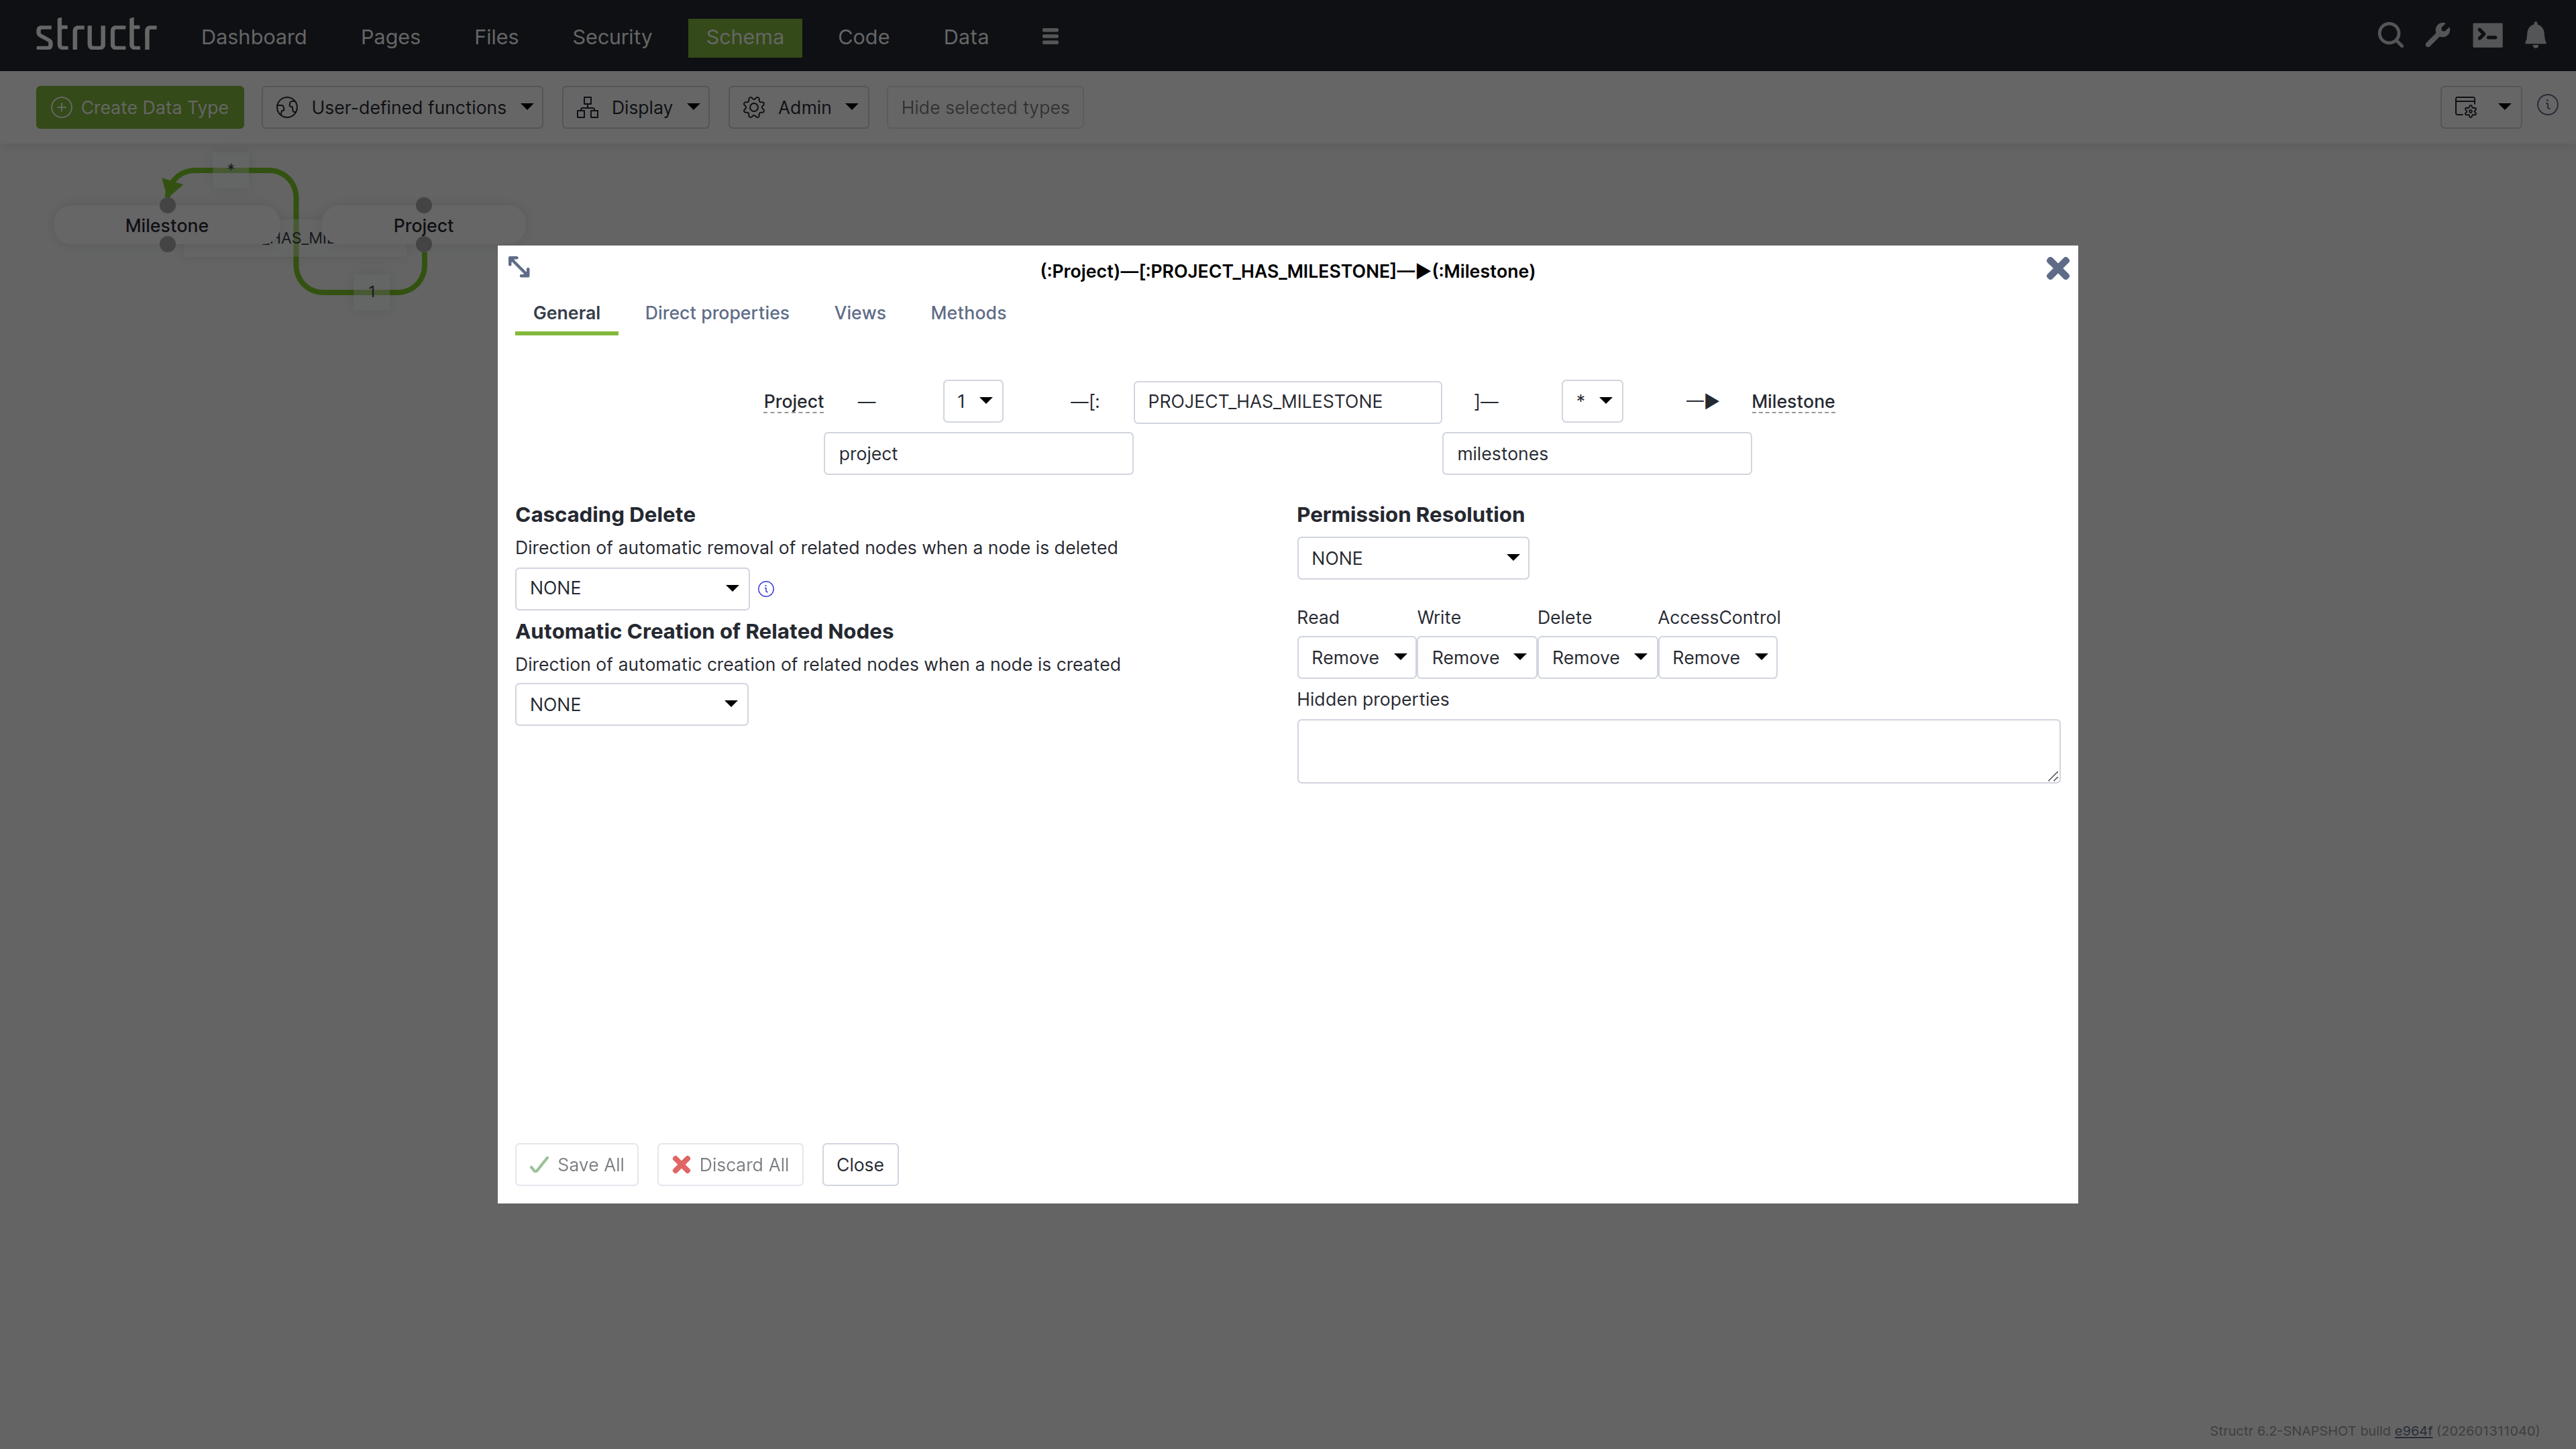
Create these relationships and set the type to:
- PROJECT_HAS_MILESTONE: One project can have many milestones
- TASK_BELONGS_TO: Many tasks belong to one project
Creating the Task Type
Create a Task type with similar structure:
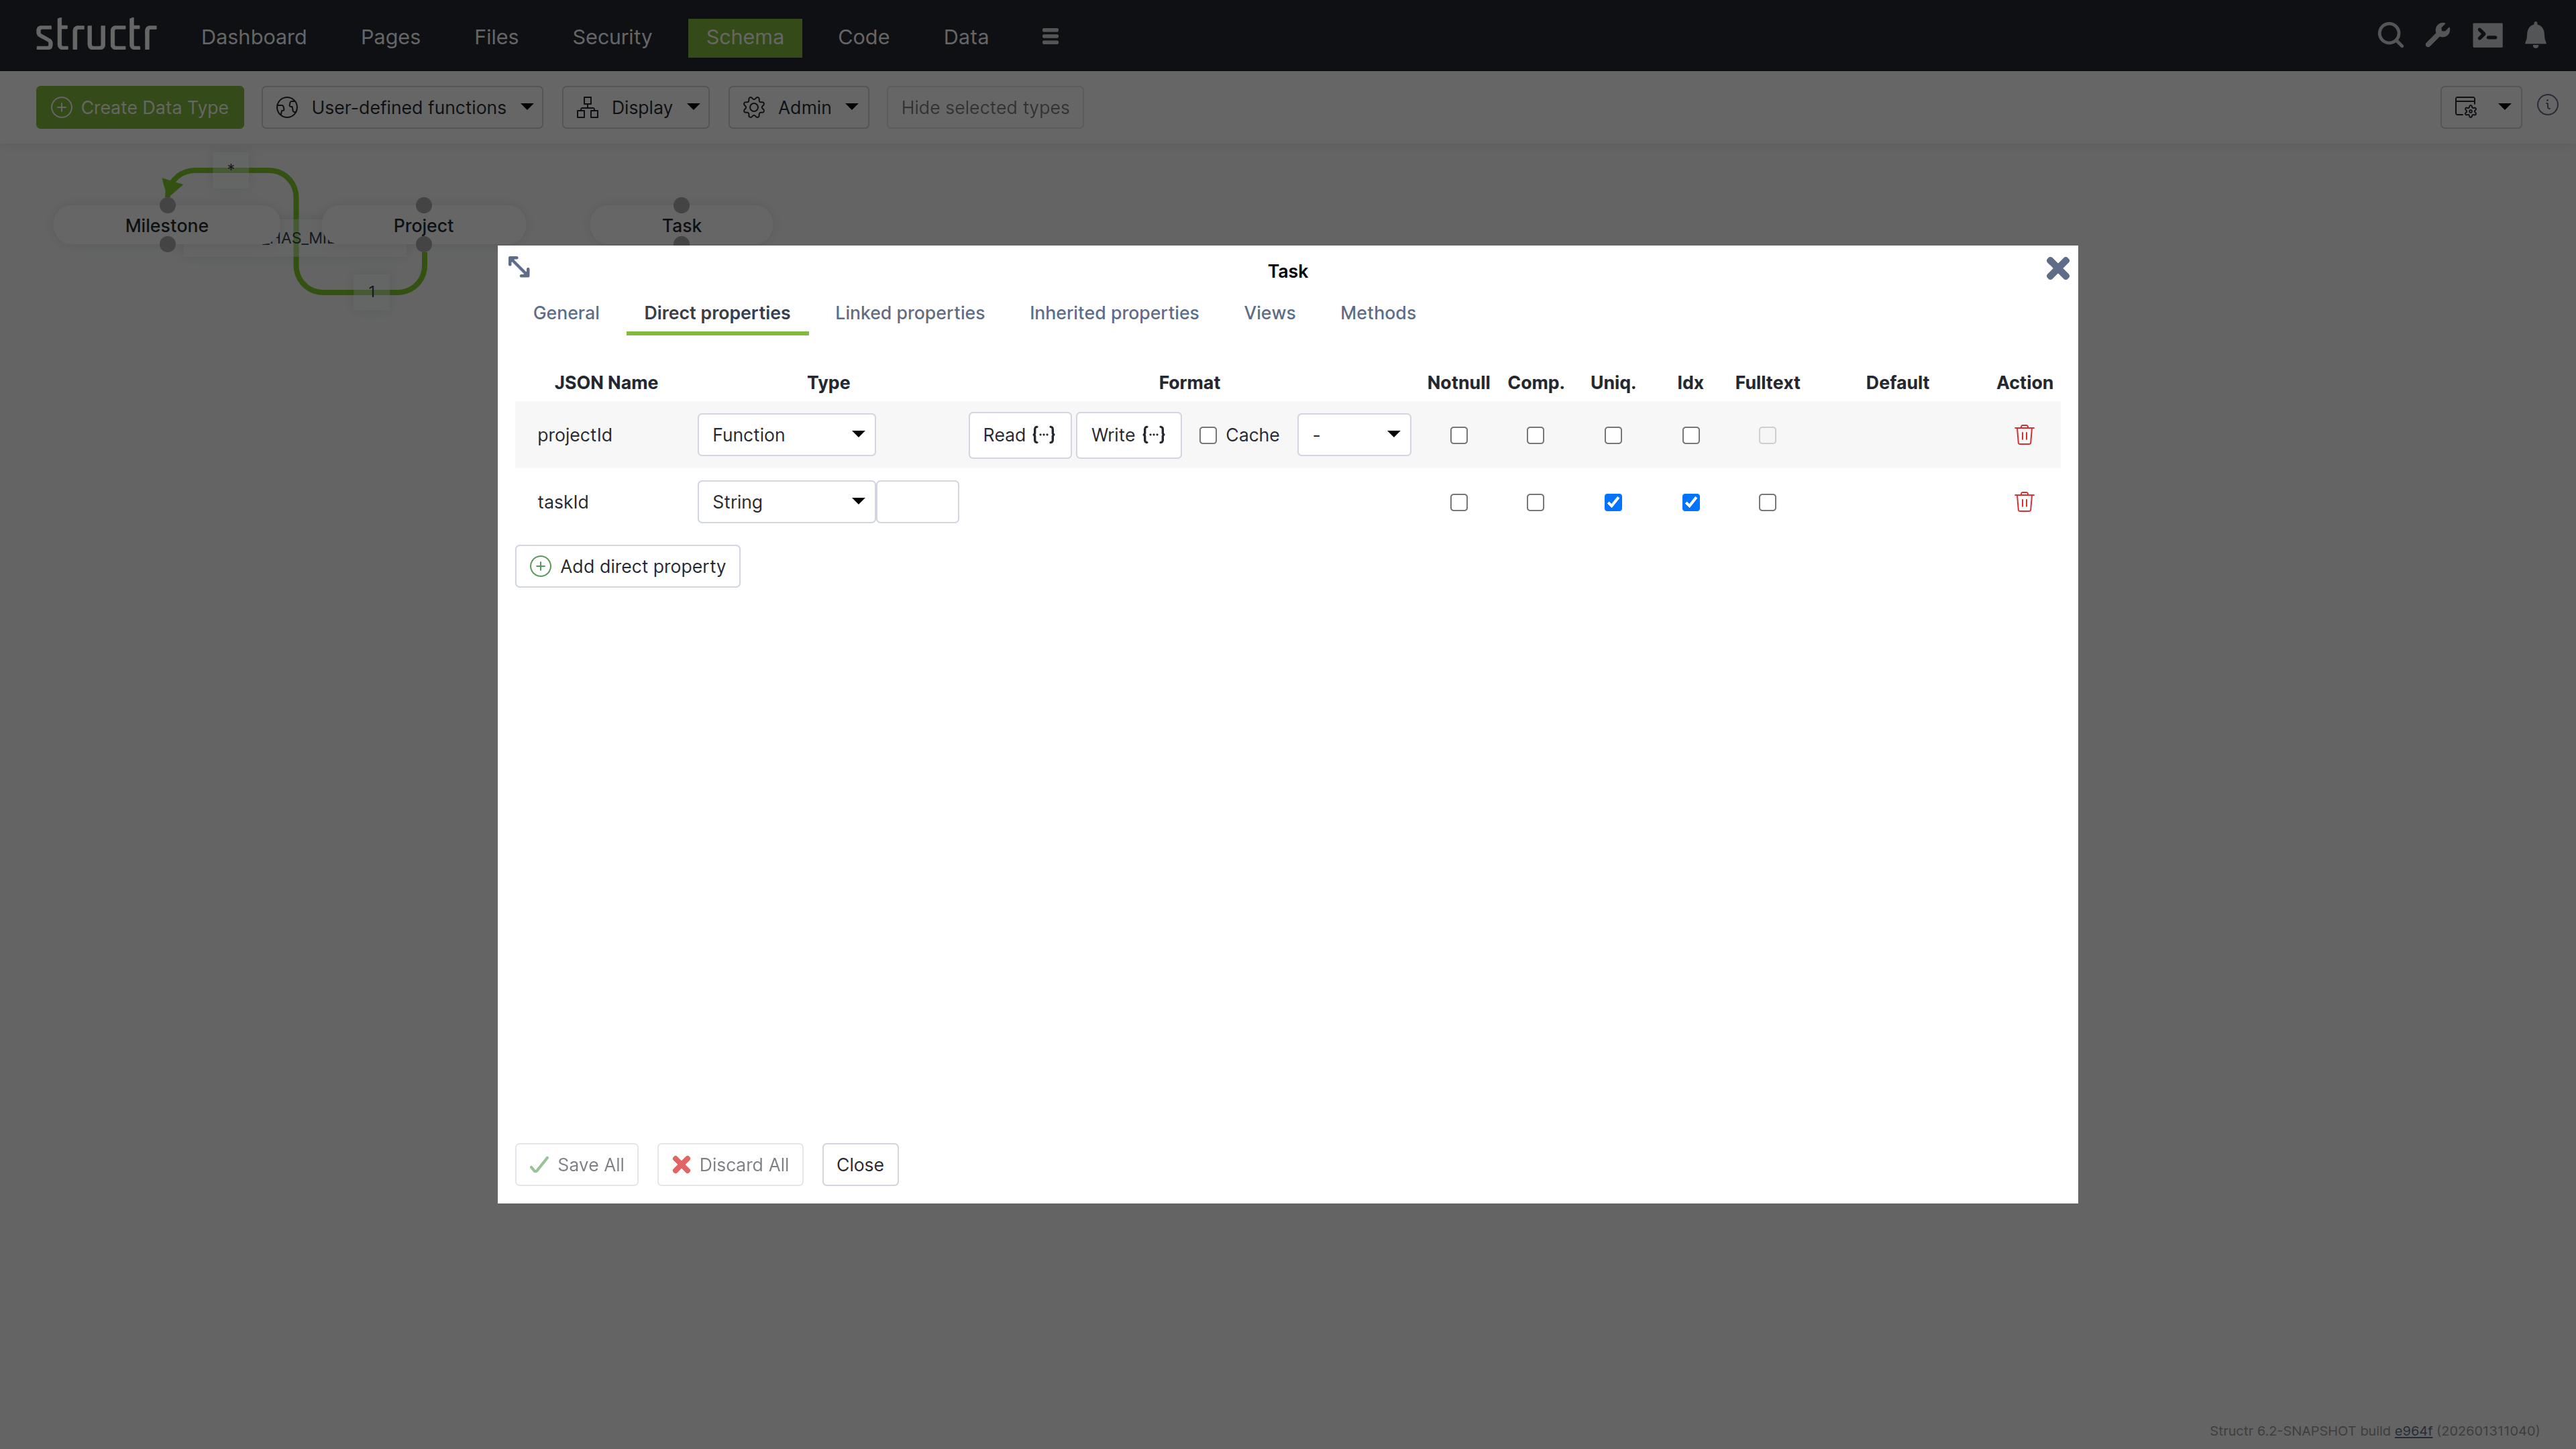
taskId: String property marked as uniqueprojectId: Function property linking to projects
Chapter 2: Adding Sample Data
Switch to the Data tab to create test records for your project management system.
Creating Projects
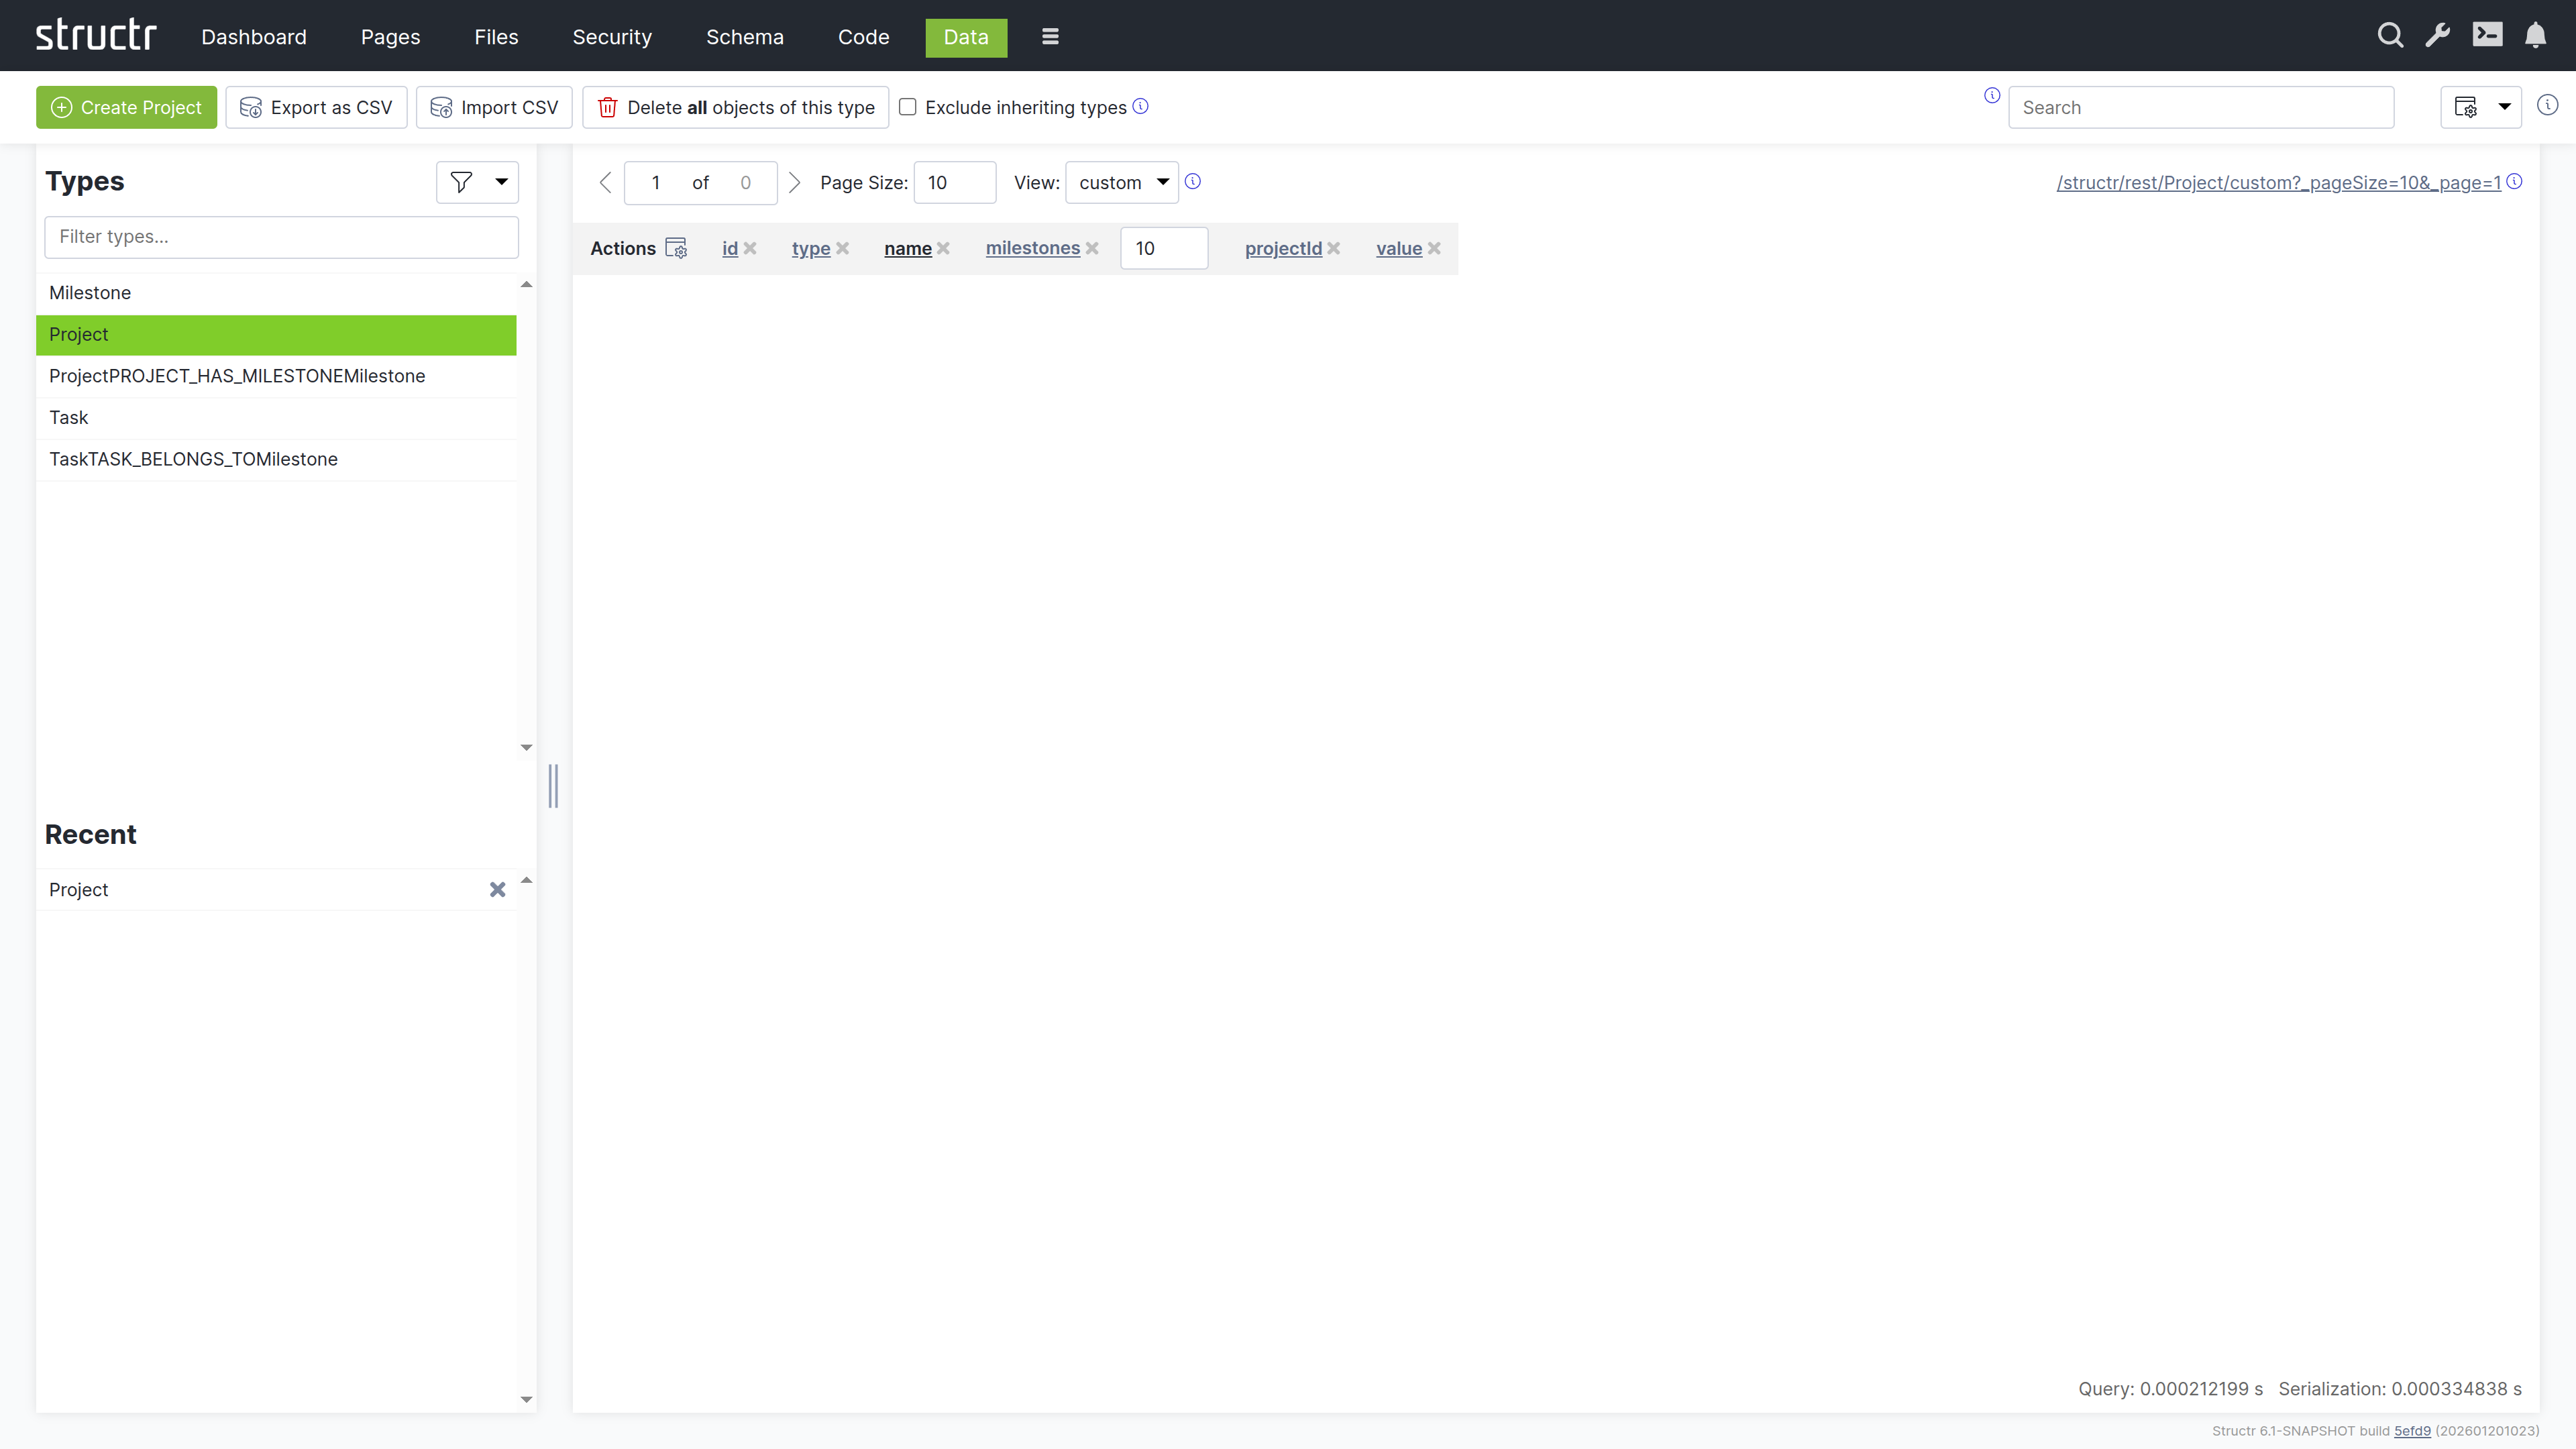
- Search for “Project” and click on the “Project” type in the sidebar
- Use “Create Project” to add three sample projects
- Set names by clicking on the name cells:
- Project A
- Project B
- Project C
Creating Milestones
- Click on the “Milestone” type
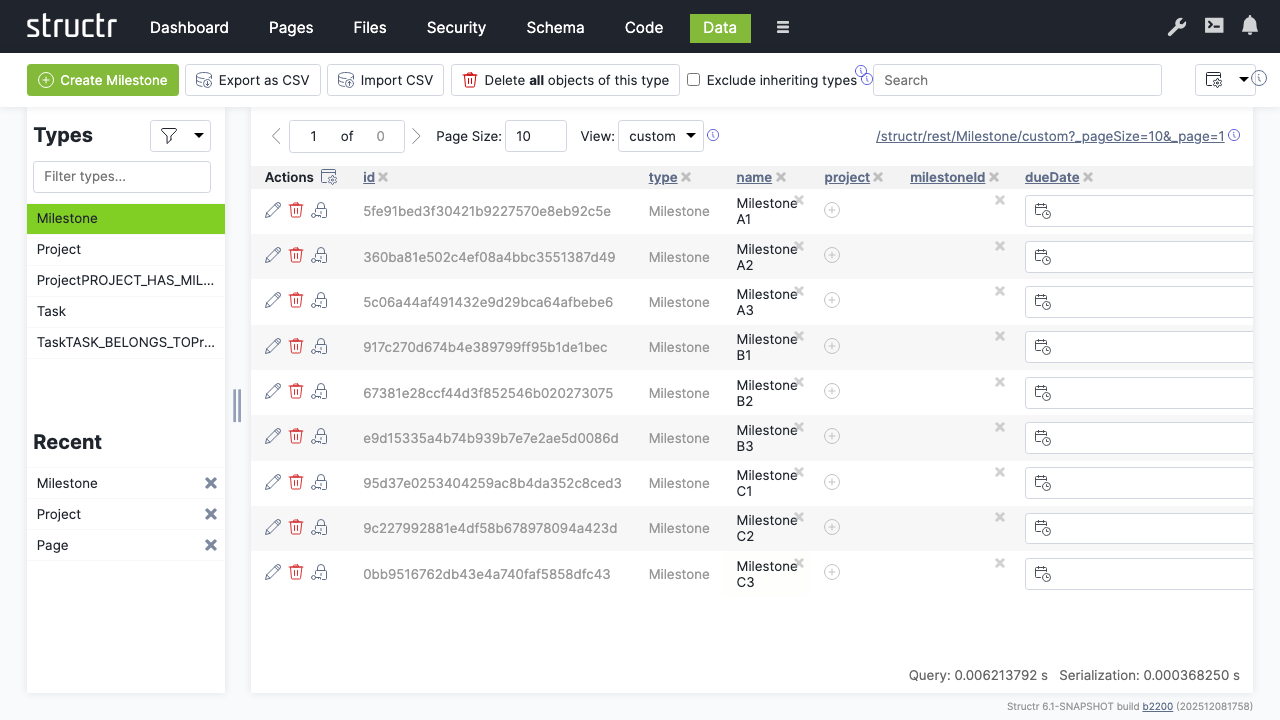
- Create a couple of milestone records
- Name them according to their projects, e.g.:
- Milestone A1, A2, A3 (for Project A)
- Milestone B1, B2, B3 (for Project B)
- Milestone C1, C2, C3 (for Project C)
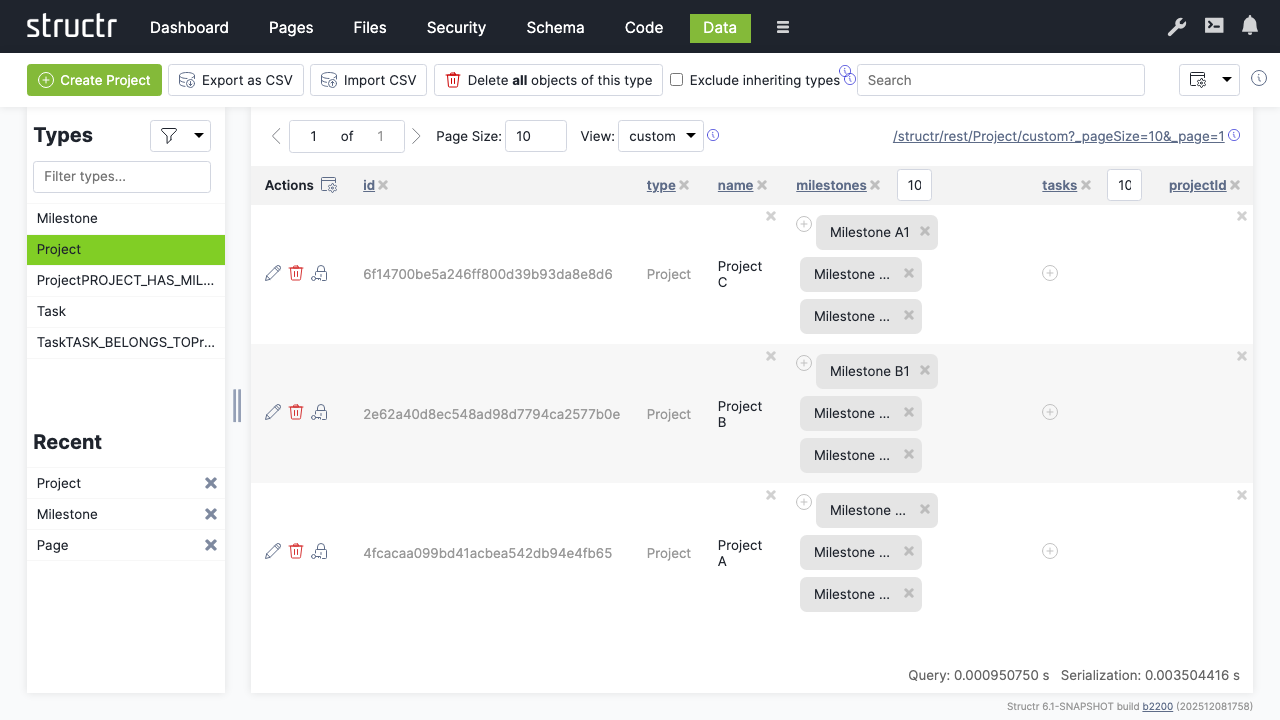
Linking Data
Connect milestones to their respective projects:
- Select the “Project” type
- Click the relationship icon in the “milestones” column for each project
- Select the appropriate milestones for each project
Chapter 3: Building the Web Interface
Create a web page to display your project data using Structr’s page builder.
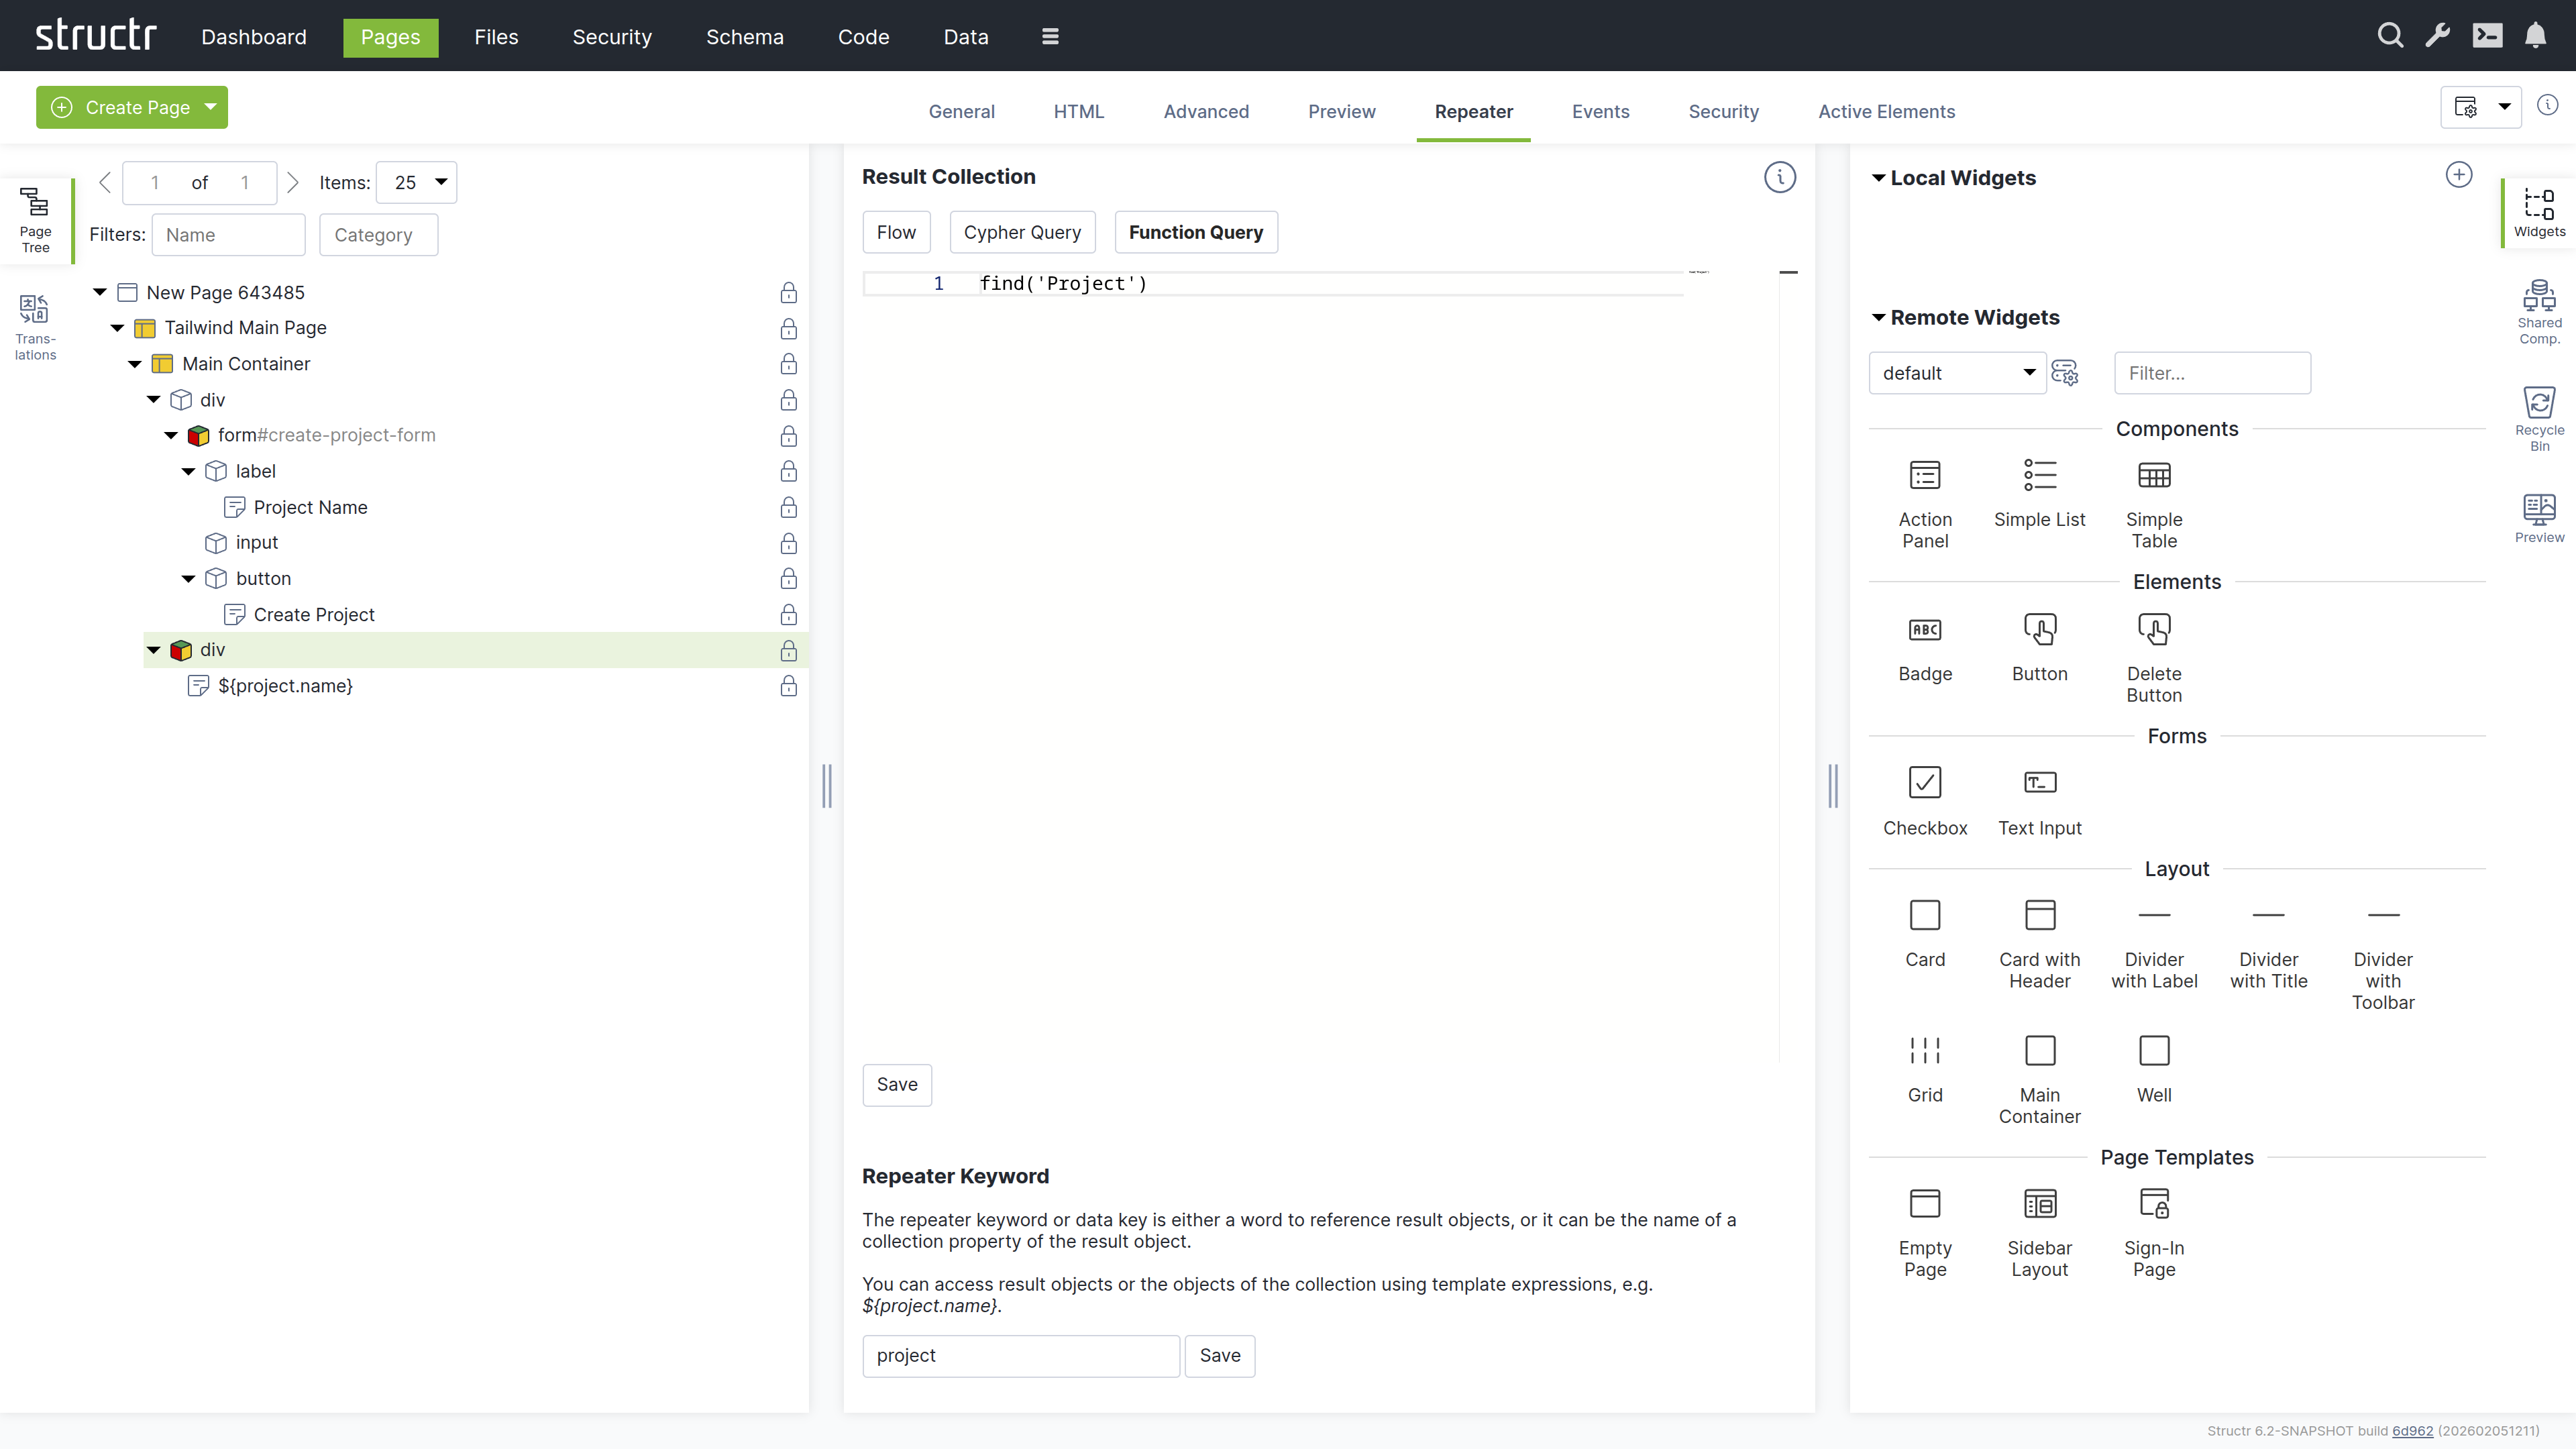
Creating a New Page
- Click “Create Page”
- Choose the “Simple Page” tile
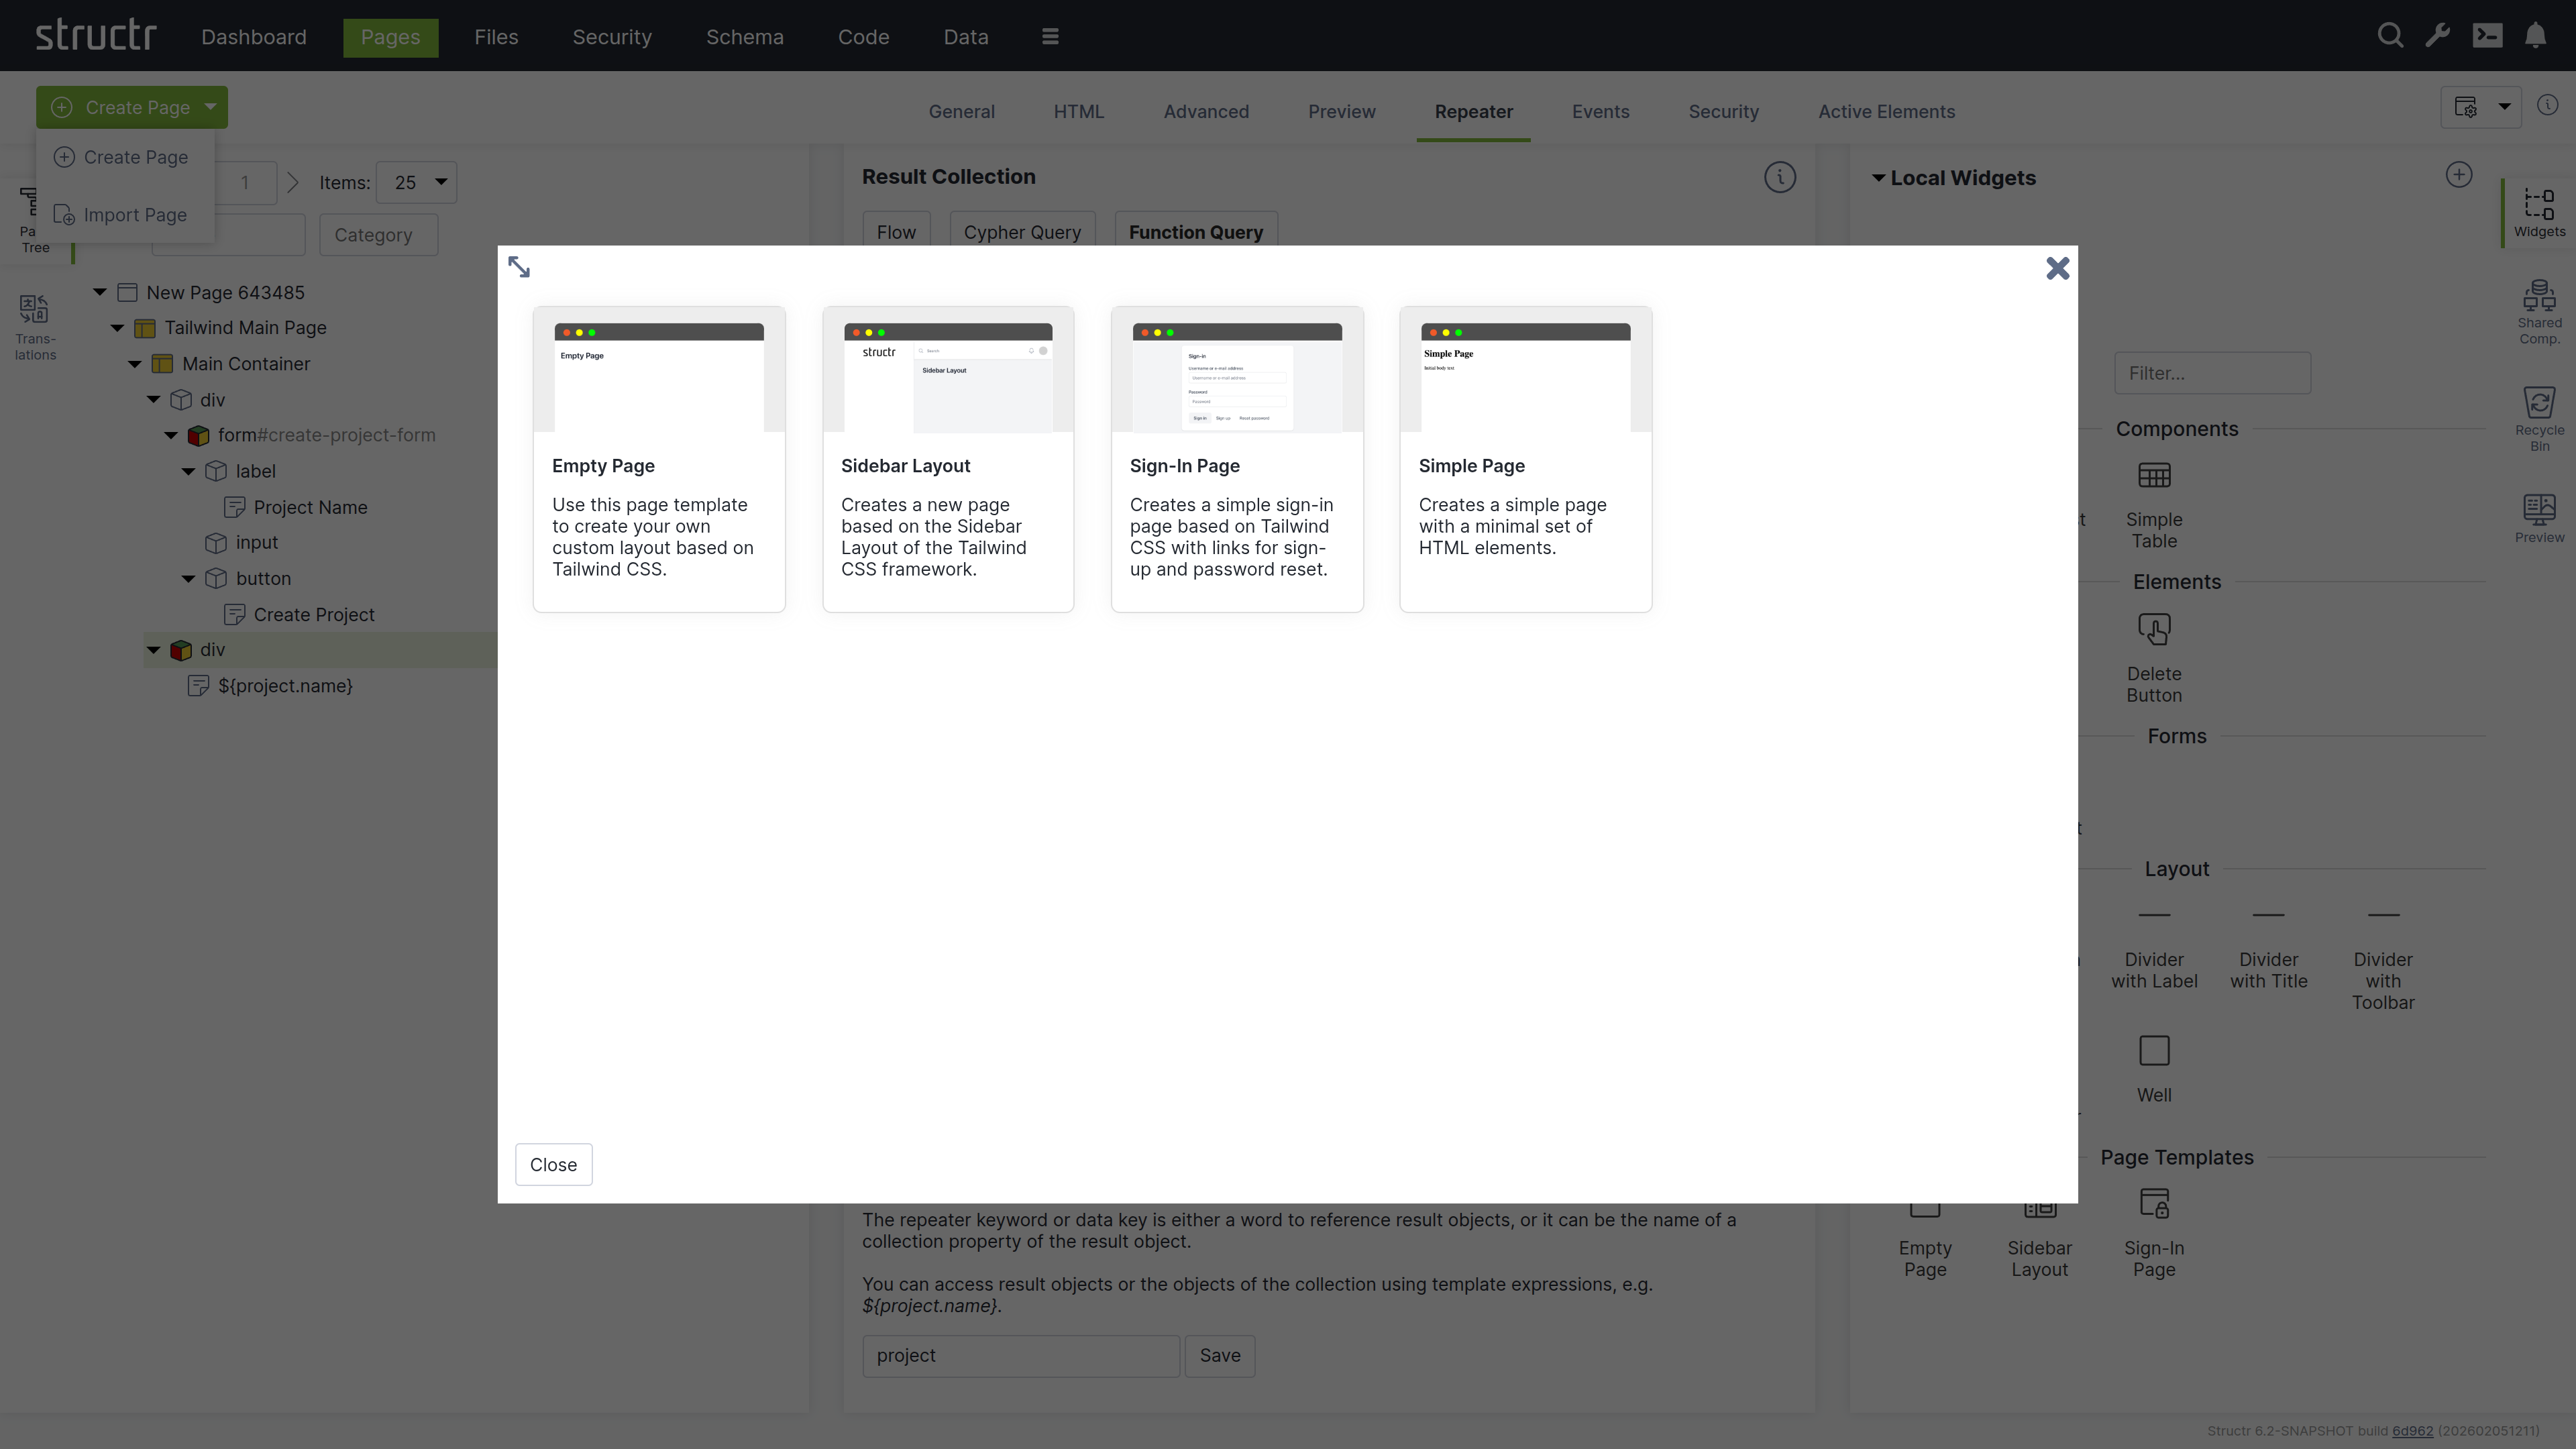
The dialog also offers to import the default widget set from structr.com. The widget set contains a complete page layout and ready-made components such as a Table that renders the records of a type without any markup. This tutorial does not use it, because building the table by hand is the quickest way to learn template expressions and repeaters, which you need for every page that goes beyond the ready-made components. The Widgets & Components chapter shows the same result built with the widget set.
- Name the page “projects” in the General tab
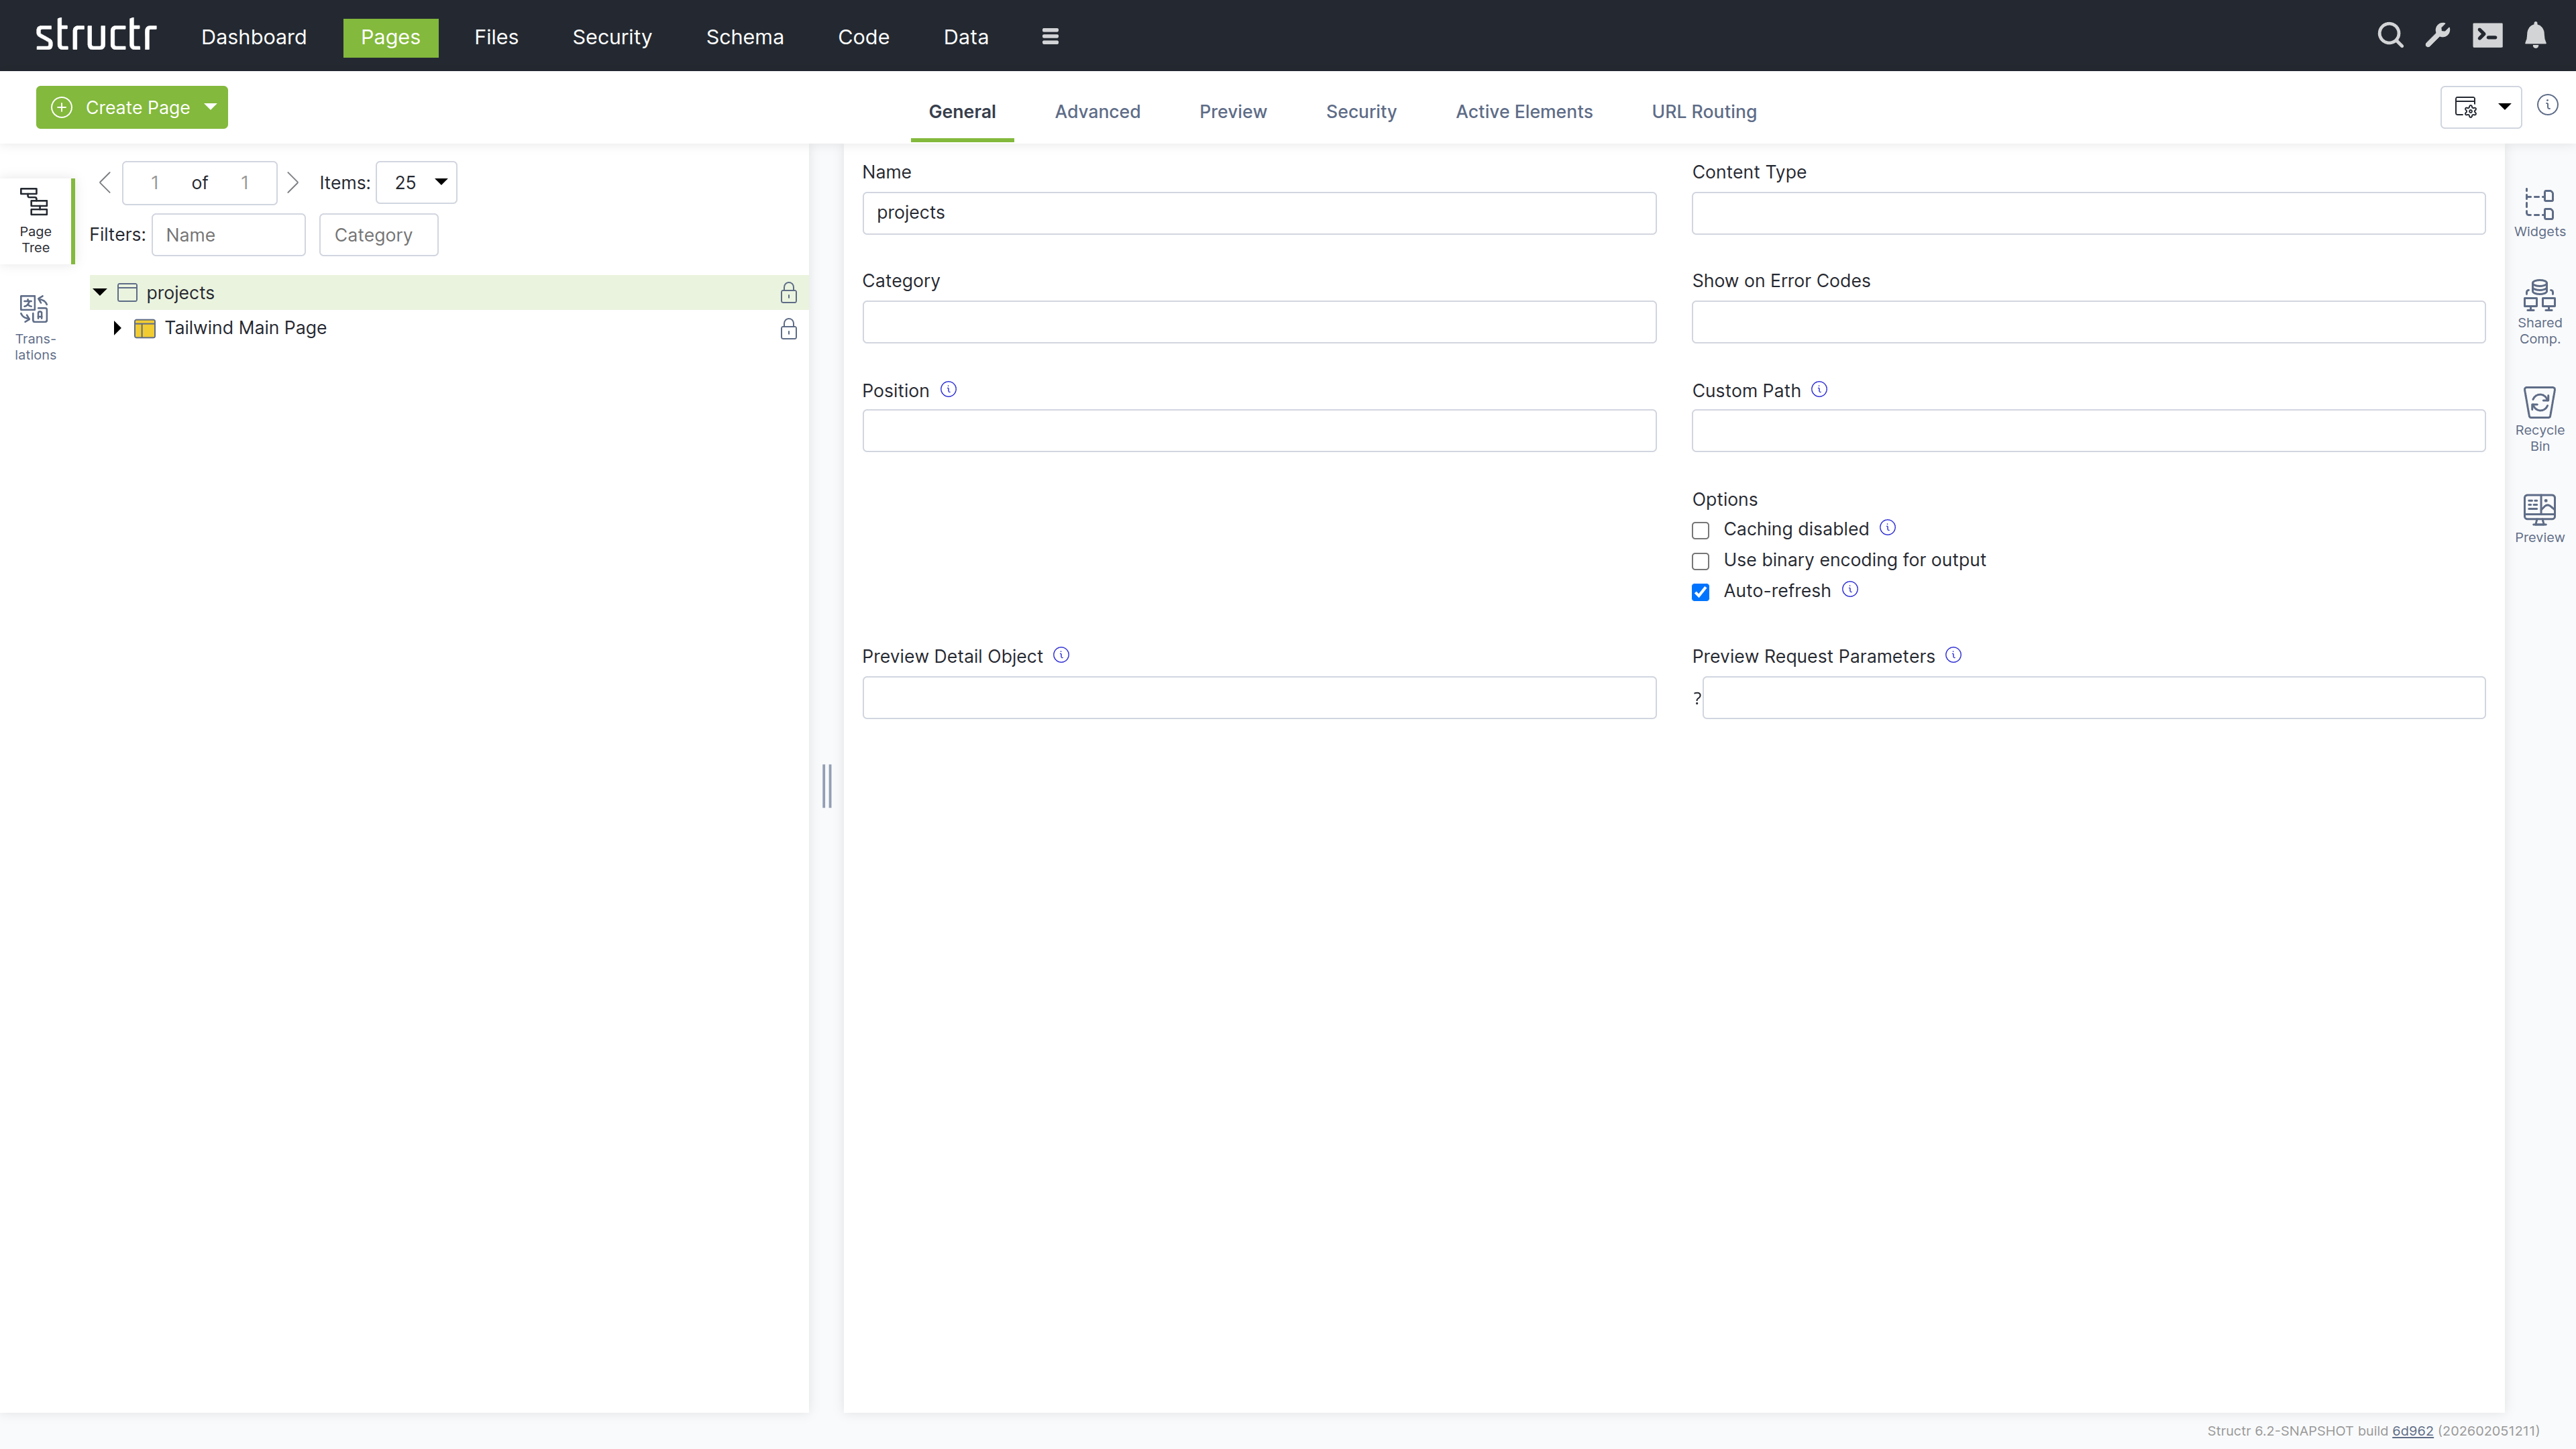
- Right-click the page, open “Expand / Collapse” and select “Expand subtree recursively” to see all elements
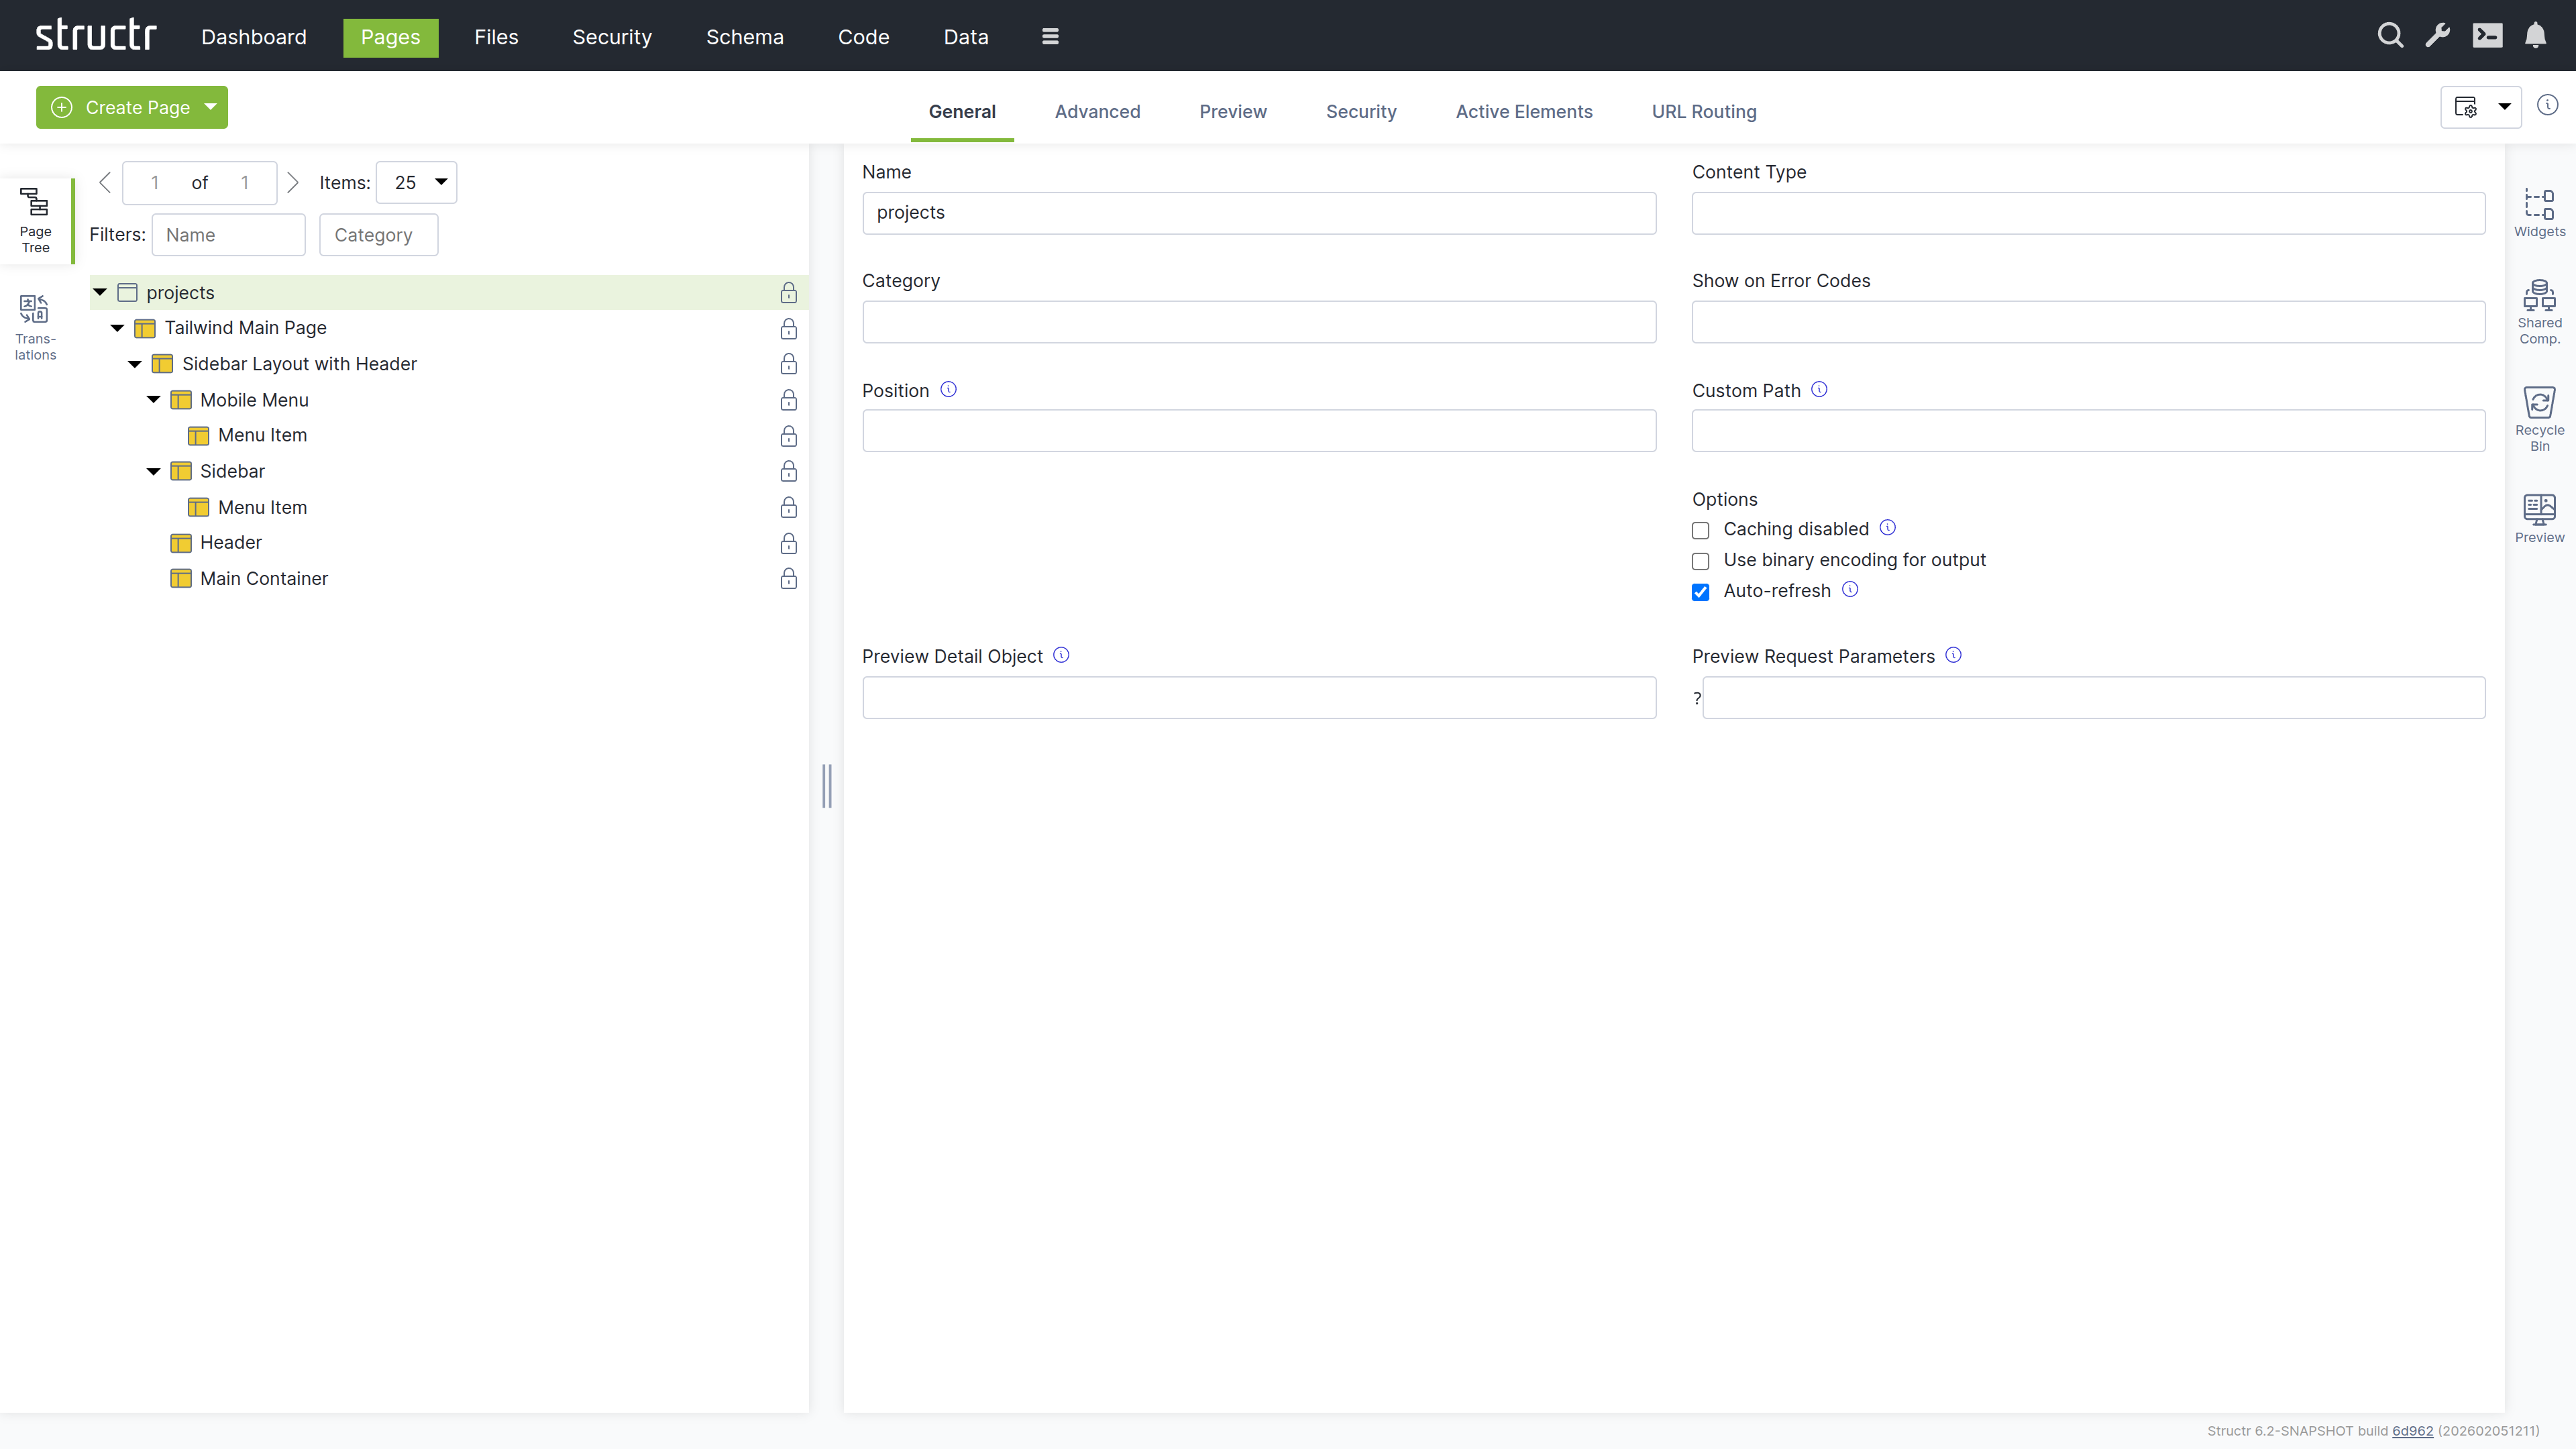
The Simple Page consists of an html element with a head and a body. The body contains a heading with the page name and a div with a placeholder text.
Adding a Table
A Widget is a reusable piece of markup that you drag into a page. The Widgets flyout of a new application is empty, so you create the table widget yourself:
- Switch to the Preview tab to see your page
- Open the tab on the right-hand side labeled “Widgets”
- Click the plus icon in the upper right corner of the flyout to create a new Widget
- Paste the following source into the Source tab and click “Save and close”
<div data-structr-meta-name="Simple Table Widget" class="overflow-hidden shadow ring-1 ring-black ring-opacity-5 md:rounded-lg">
<table class="min-w-full divide-y divide-gray-300">
<thead class="bg-gray-50">
<tr>
<th scope="col" class="py-3.5 pl-4 pr-3 text-left text-sm font-semibold text-gray-900 sm:pl-6">Name</th>
<th scope="col" class="px-3 py-3.5 text-left text-sm font-semibold text-gray-900">Title</th>
<th scope="col" class="px-3 py-3.5 text-left text-sm font-semibold text-gray-900">Email</th>
<th scope="col" class="px-3 py-3.5 text-left text-sm font-semibold text-gray-900">Role</th>
<th scope="col" class="relative py-3.5 pl-3 pr-4 sm:pr-6">
<span class="sr-only">Edit</span>
</th>
</tr>
</thead>
<tbody class="divide-y divide-gray-200 bg-white">
<tr>
<td class="whitespace-nowrap py-4 pl-4 pr-3 text-sm font-medium text-gray-900 sm:pl-6">Firstname Lastname</td>
<td class="whitespace-nowrap px-3 py-4 text-sm text-gray-500">Example Job Title</td>
<td class="whitespace-nowrap px-3 py-4 text-sm text-gray-500">firstname.lastname@example.com</td>
<td class="whitespace-nowrap px-3 py-4 text-sm text-gray-500">Example Role</td>
<td class="relative whitespace-nowrap py-4 pl-3 pr-4 text-right text-sm font-medium sm:pr-6">
<a href="#" class="text-gray-600 hover:text-gray-900">Edit<span class="sr-only"></span></a>
</td>
</tr>
</tbody>
</table>
</div>
- The new Widget appears in the flyout under “Uncategorized”. Click its name, enter “Simple Table” and press Tab
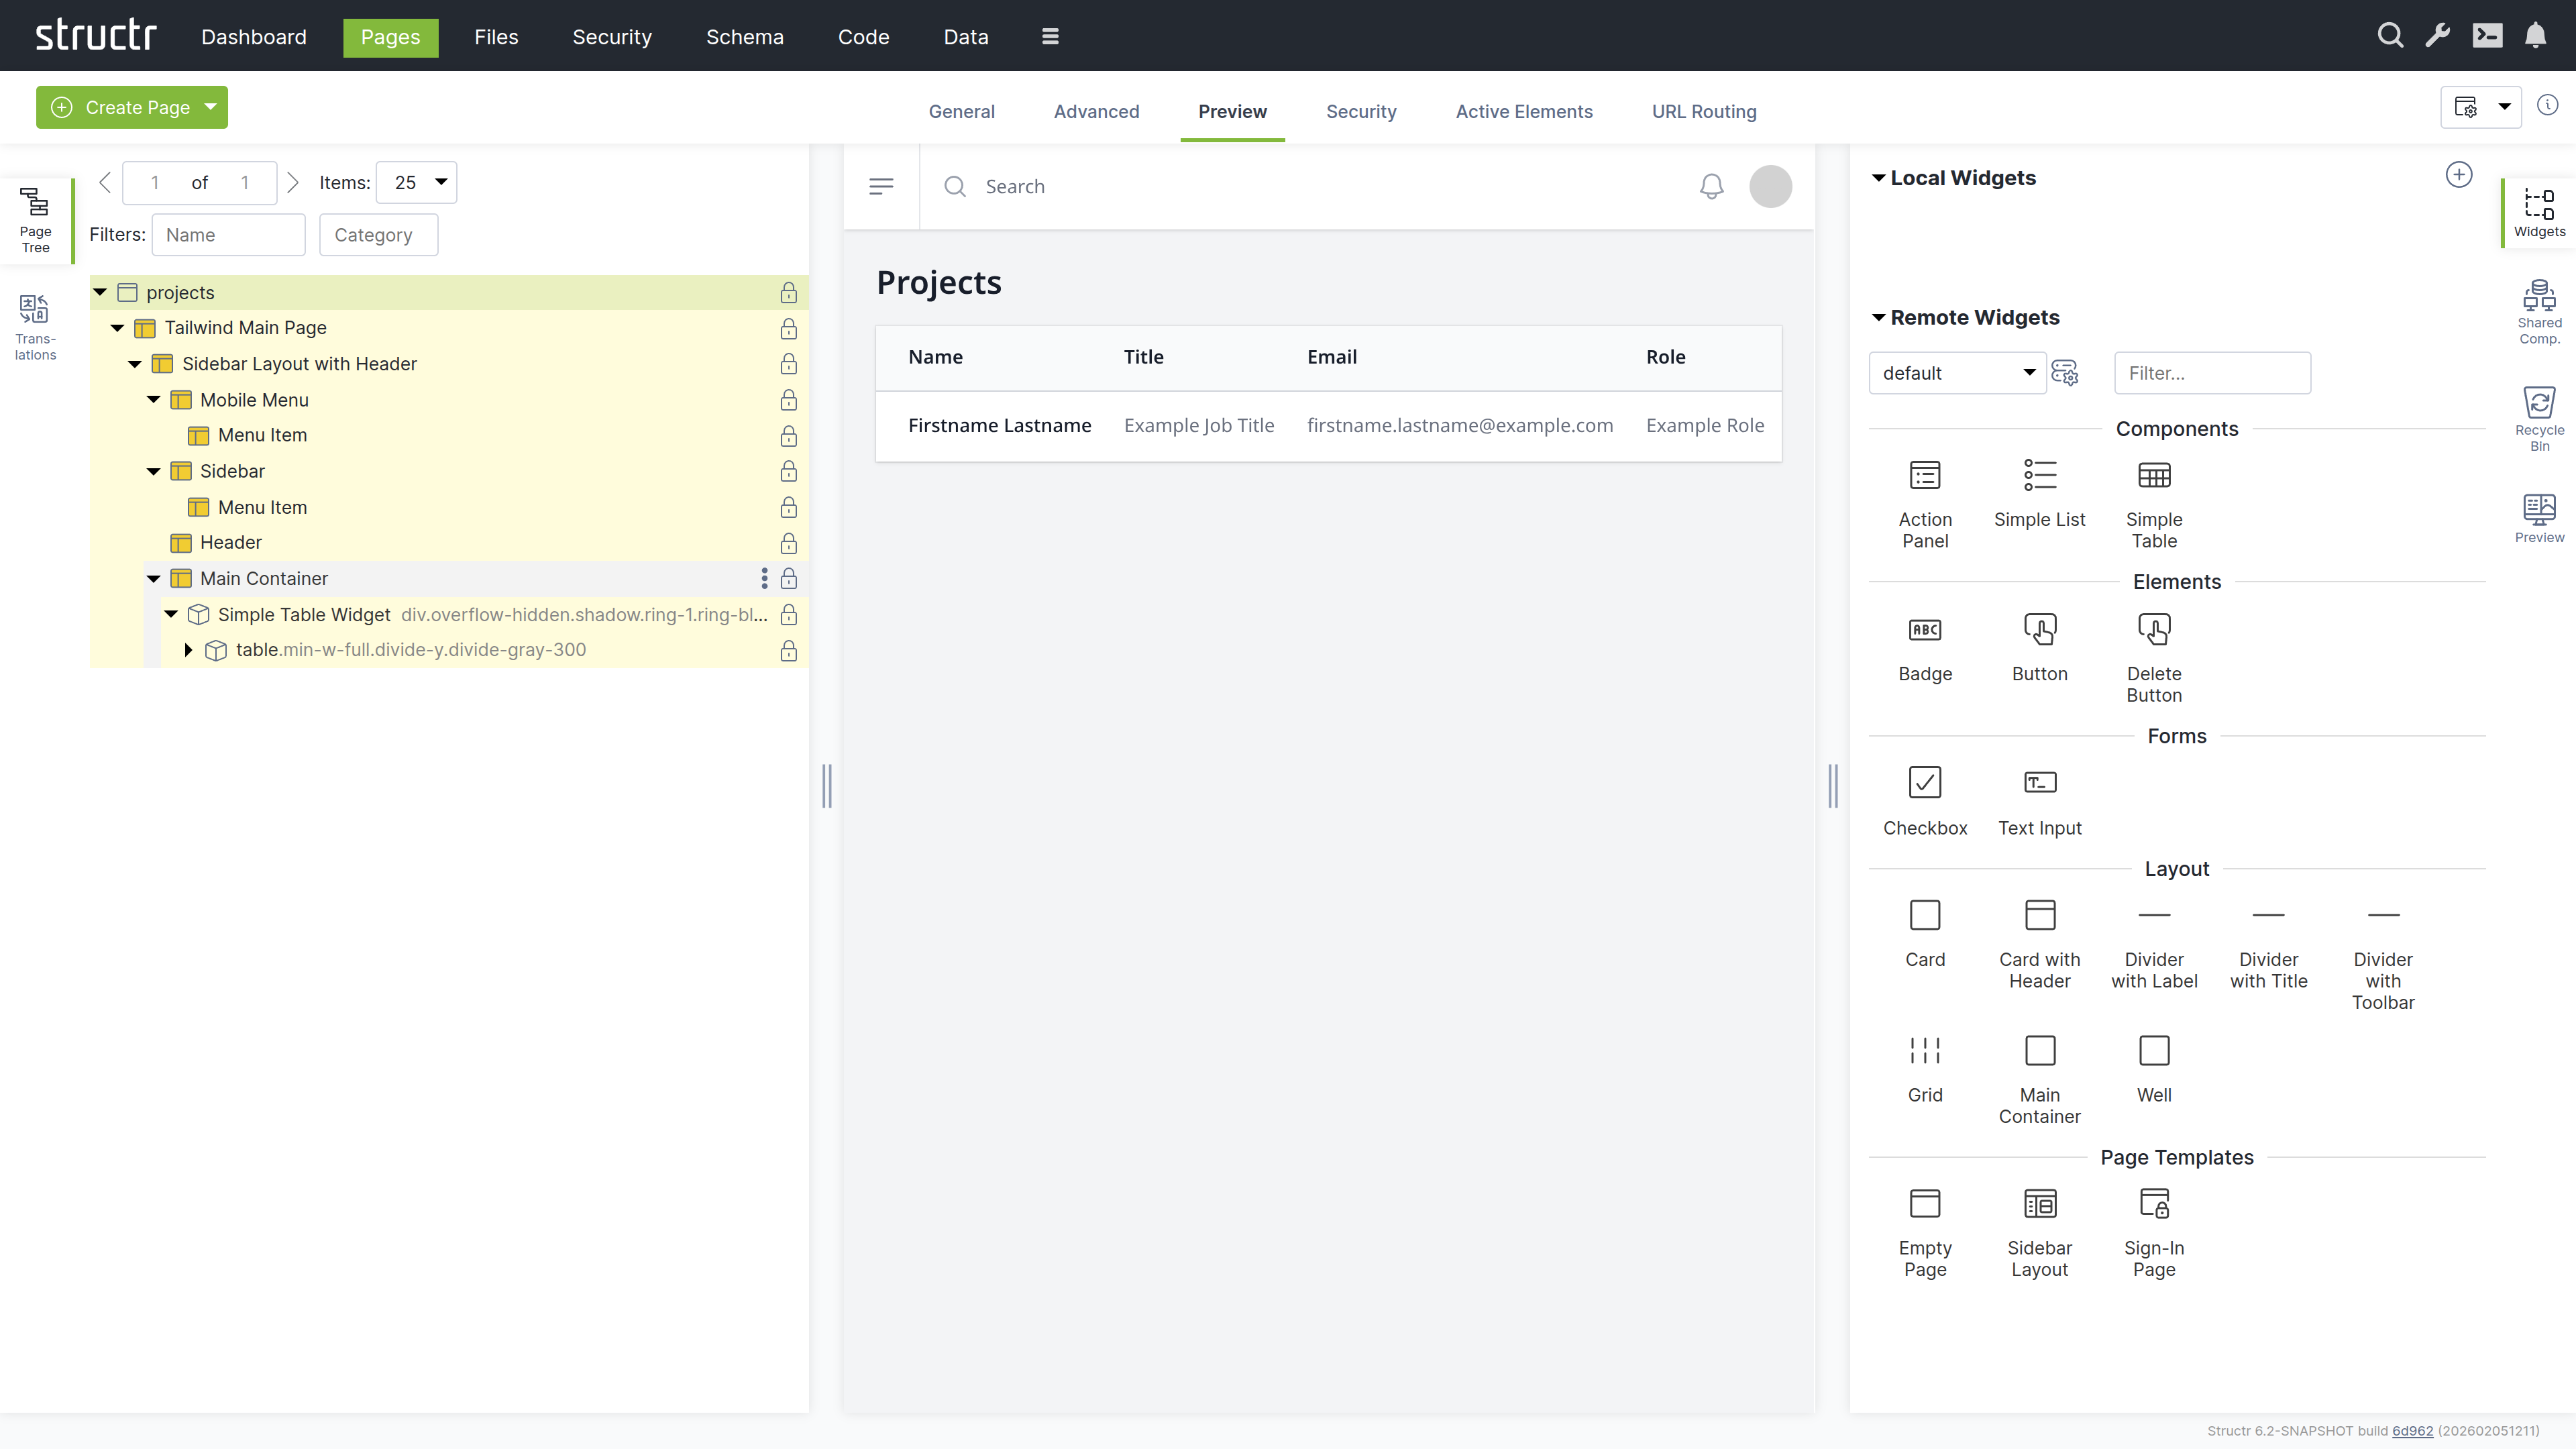
- Drag the “Simple Table” widget from the flyout onto the
bodyelement in the page tree
The widget is attached to the page tree as a branch of individual DOM elements that can be navigated and modified. The data-structr-meta-name attribute in the source becomes the name of the root element in the page tree.
Customizing the Table
Note: In this section, we’re using template expressions which are enclosed in
${...}. See the Dynamic Content chapter and the Built-in Functions reference.
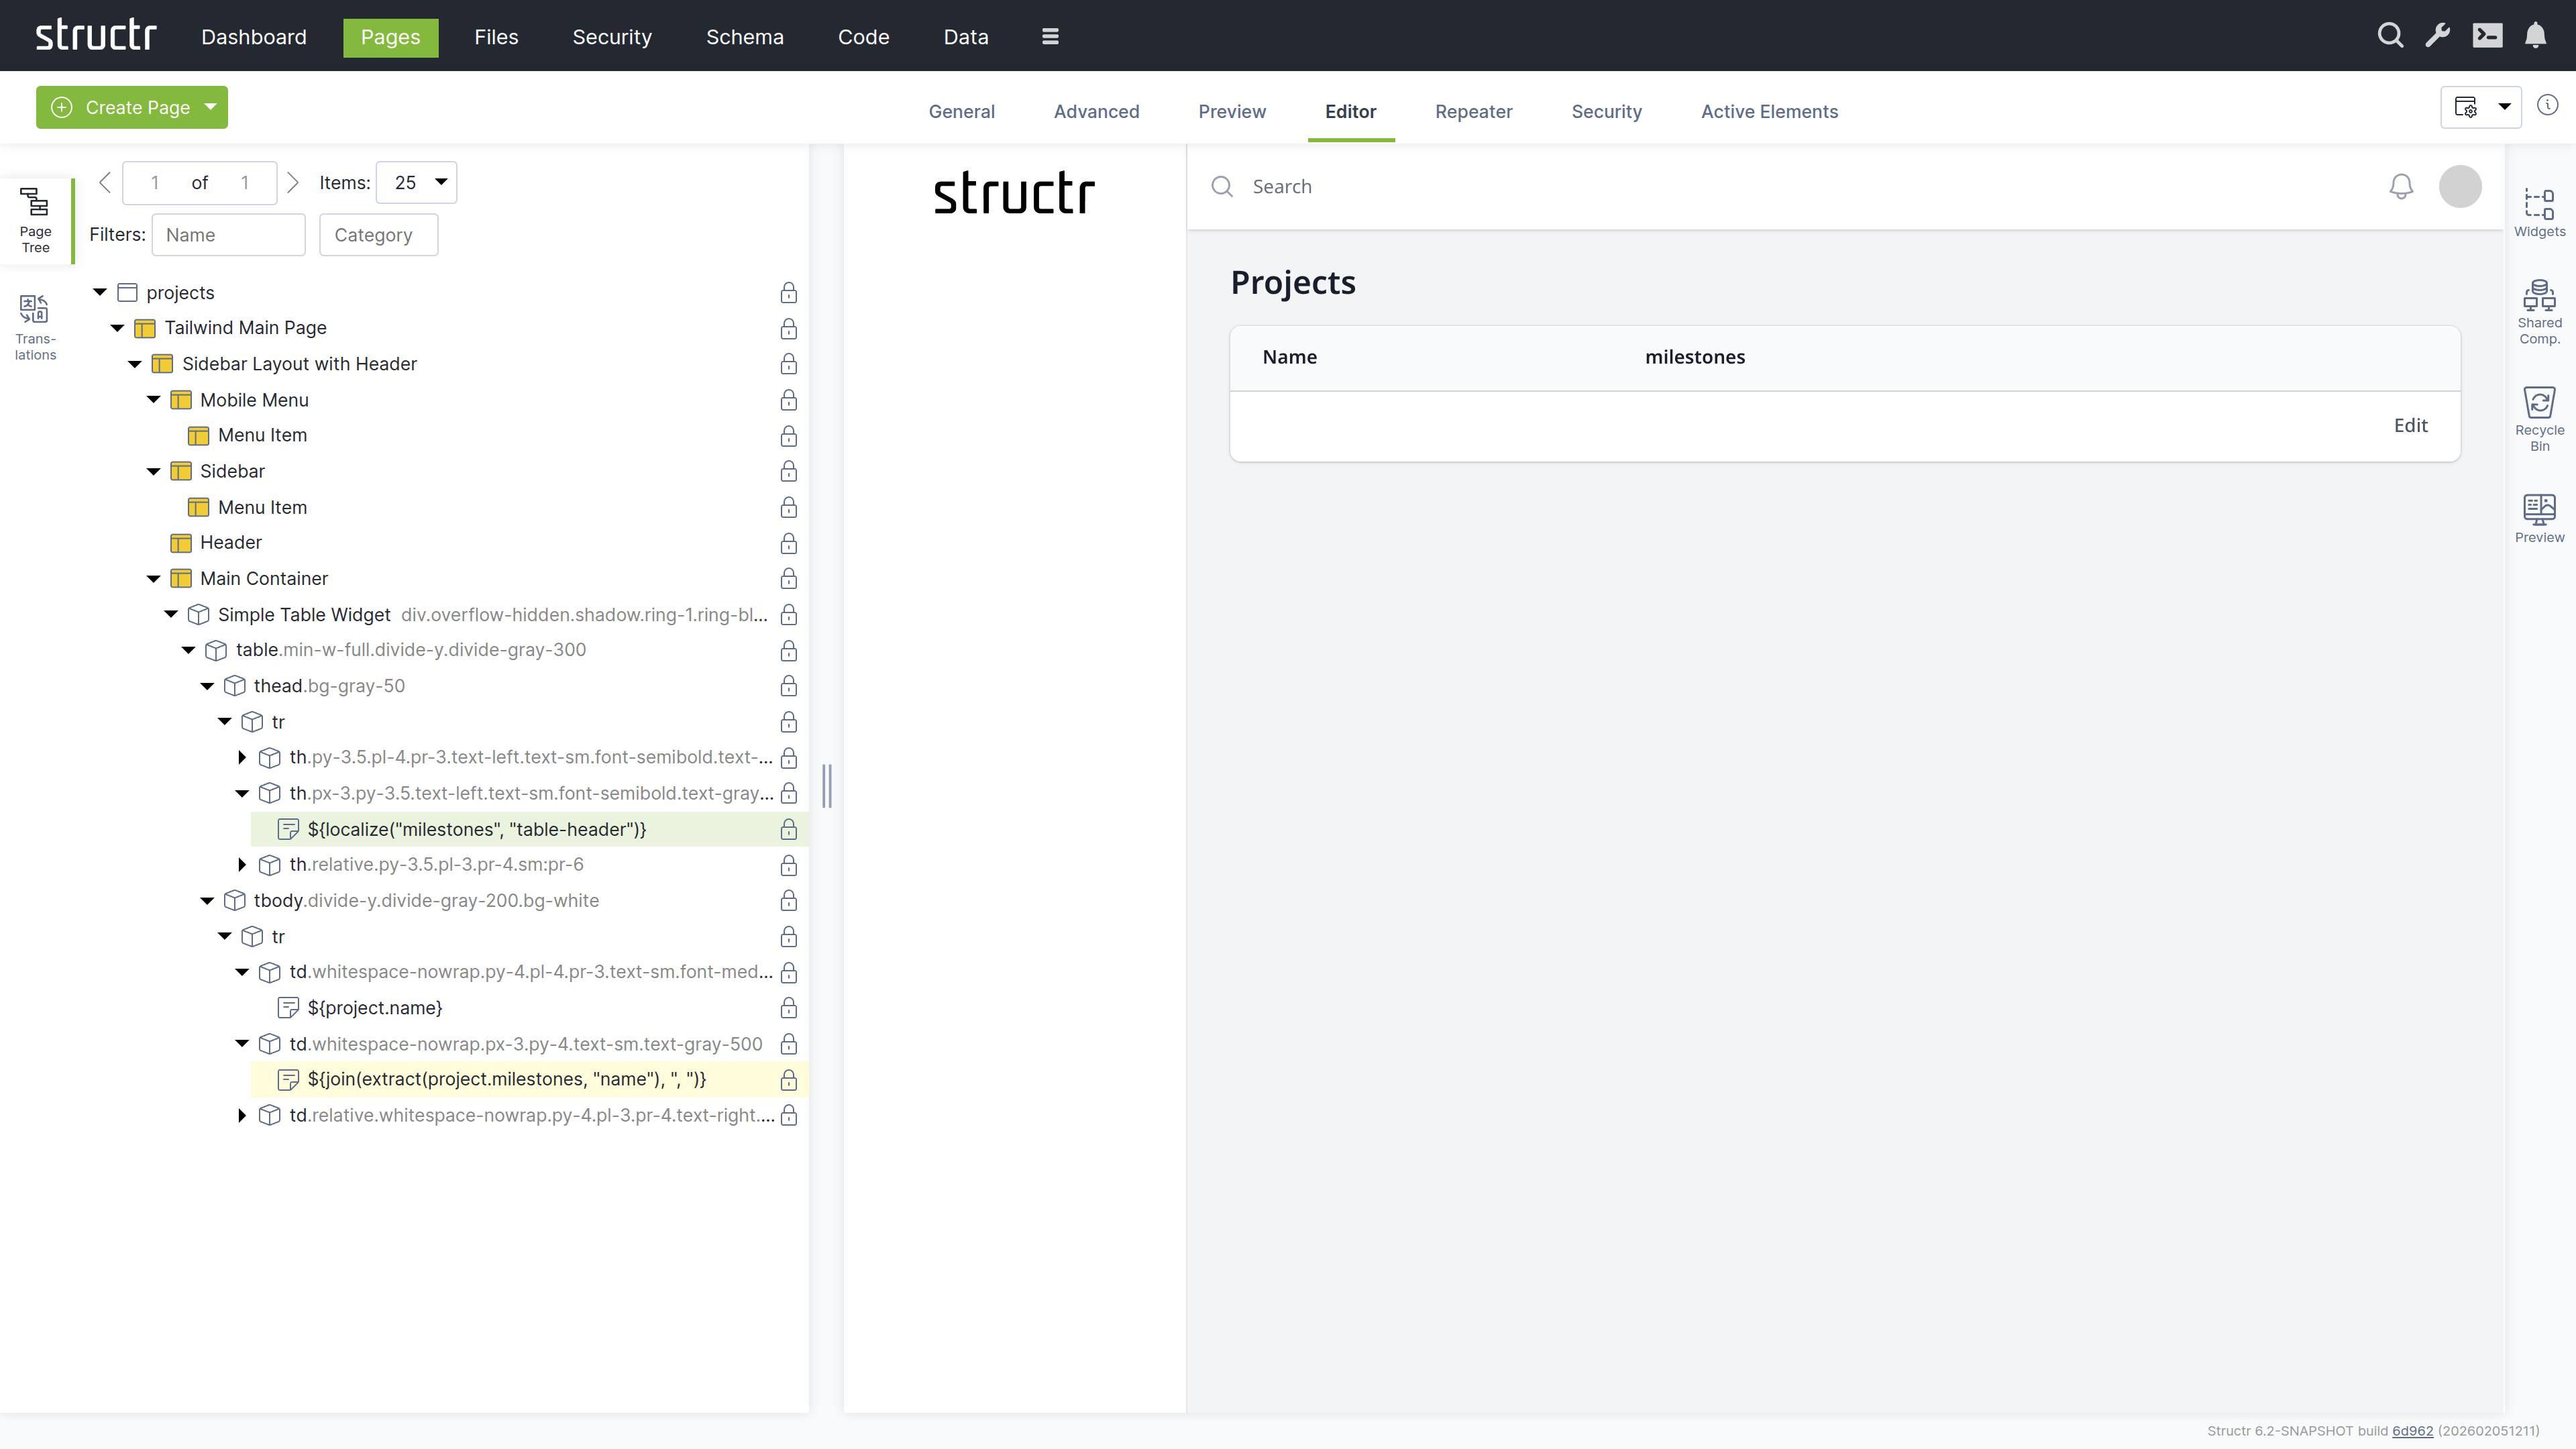
You can edit text directly in the Preview tab. Click a text in the preview and it becomes editable. Modify the table to display project information:
-
Change the table header from “Title” to a localized header:
${localize("milestones", "table-header")} -
Replace placeholder content with dynamic project data:
- Name column:
${project.name} - Description column:
${join(extract(project.milestones, "name"), ", ")}
- Remove the Email and Role columns by right-clicking their header and cell in the preview and selecting “Remove Node”
Adding Dynamic Data
Configure the table to display all projects:
- Select the table row (
tr) element insidetbodyin the page tree - Switch to the “Repeater” tab
- Set up a Function Query:
find('Project') - Set the data key to “project”
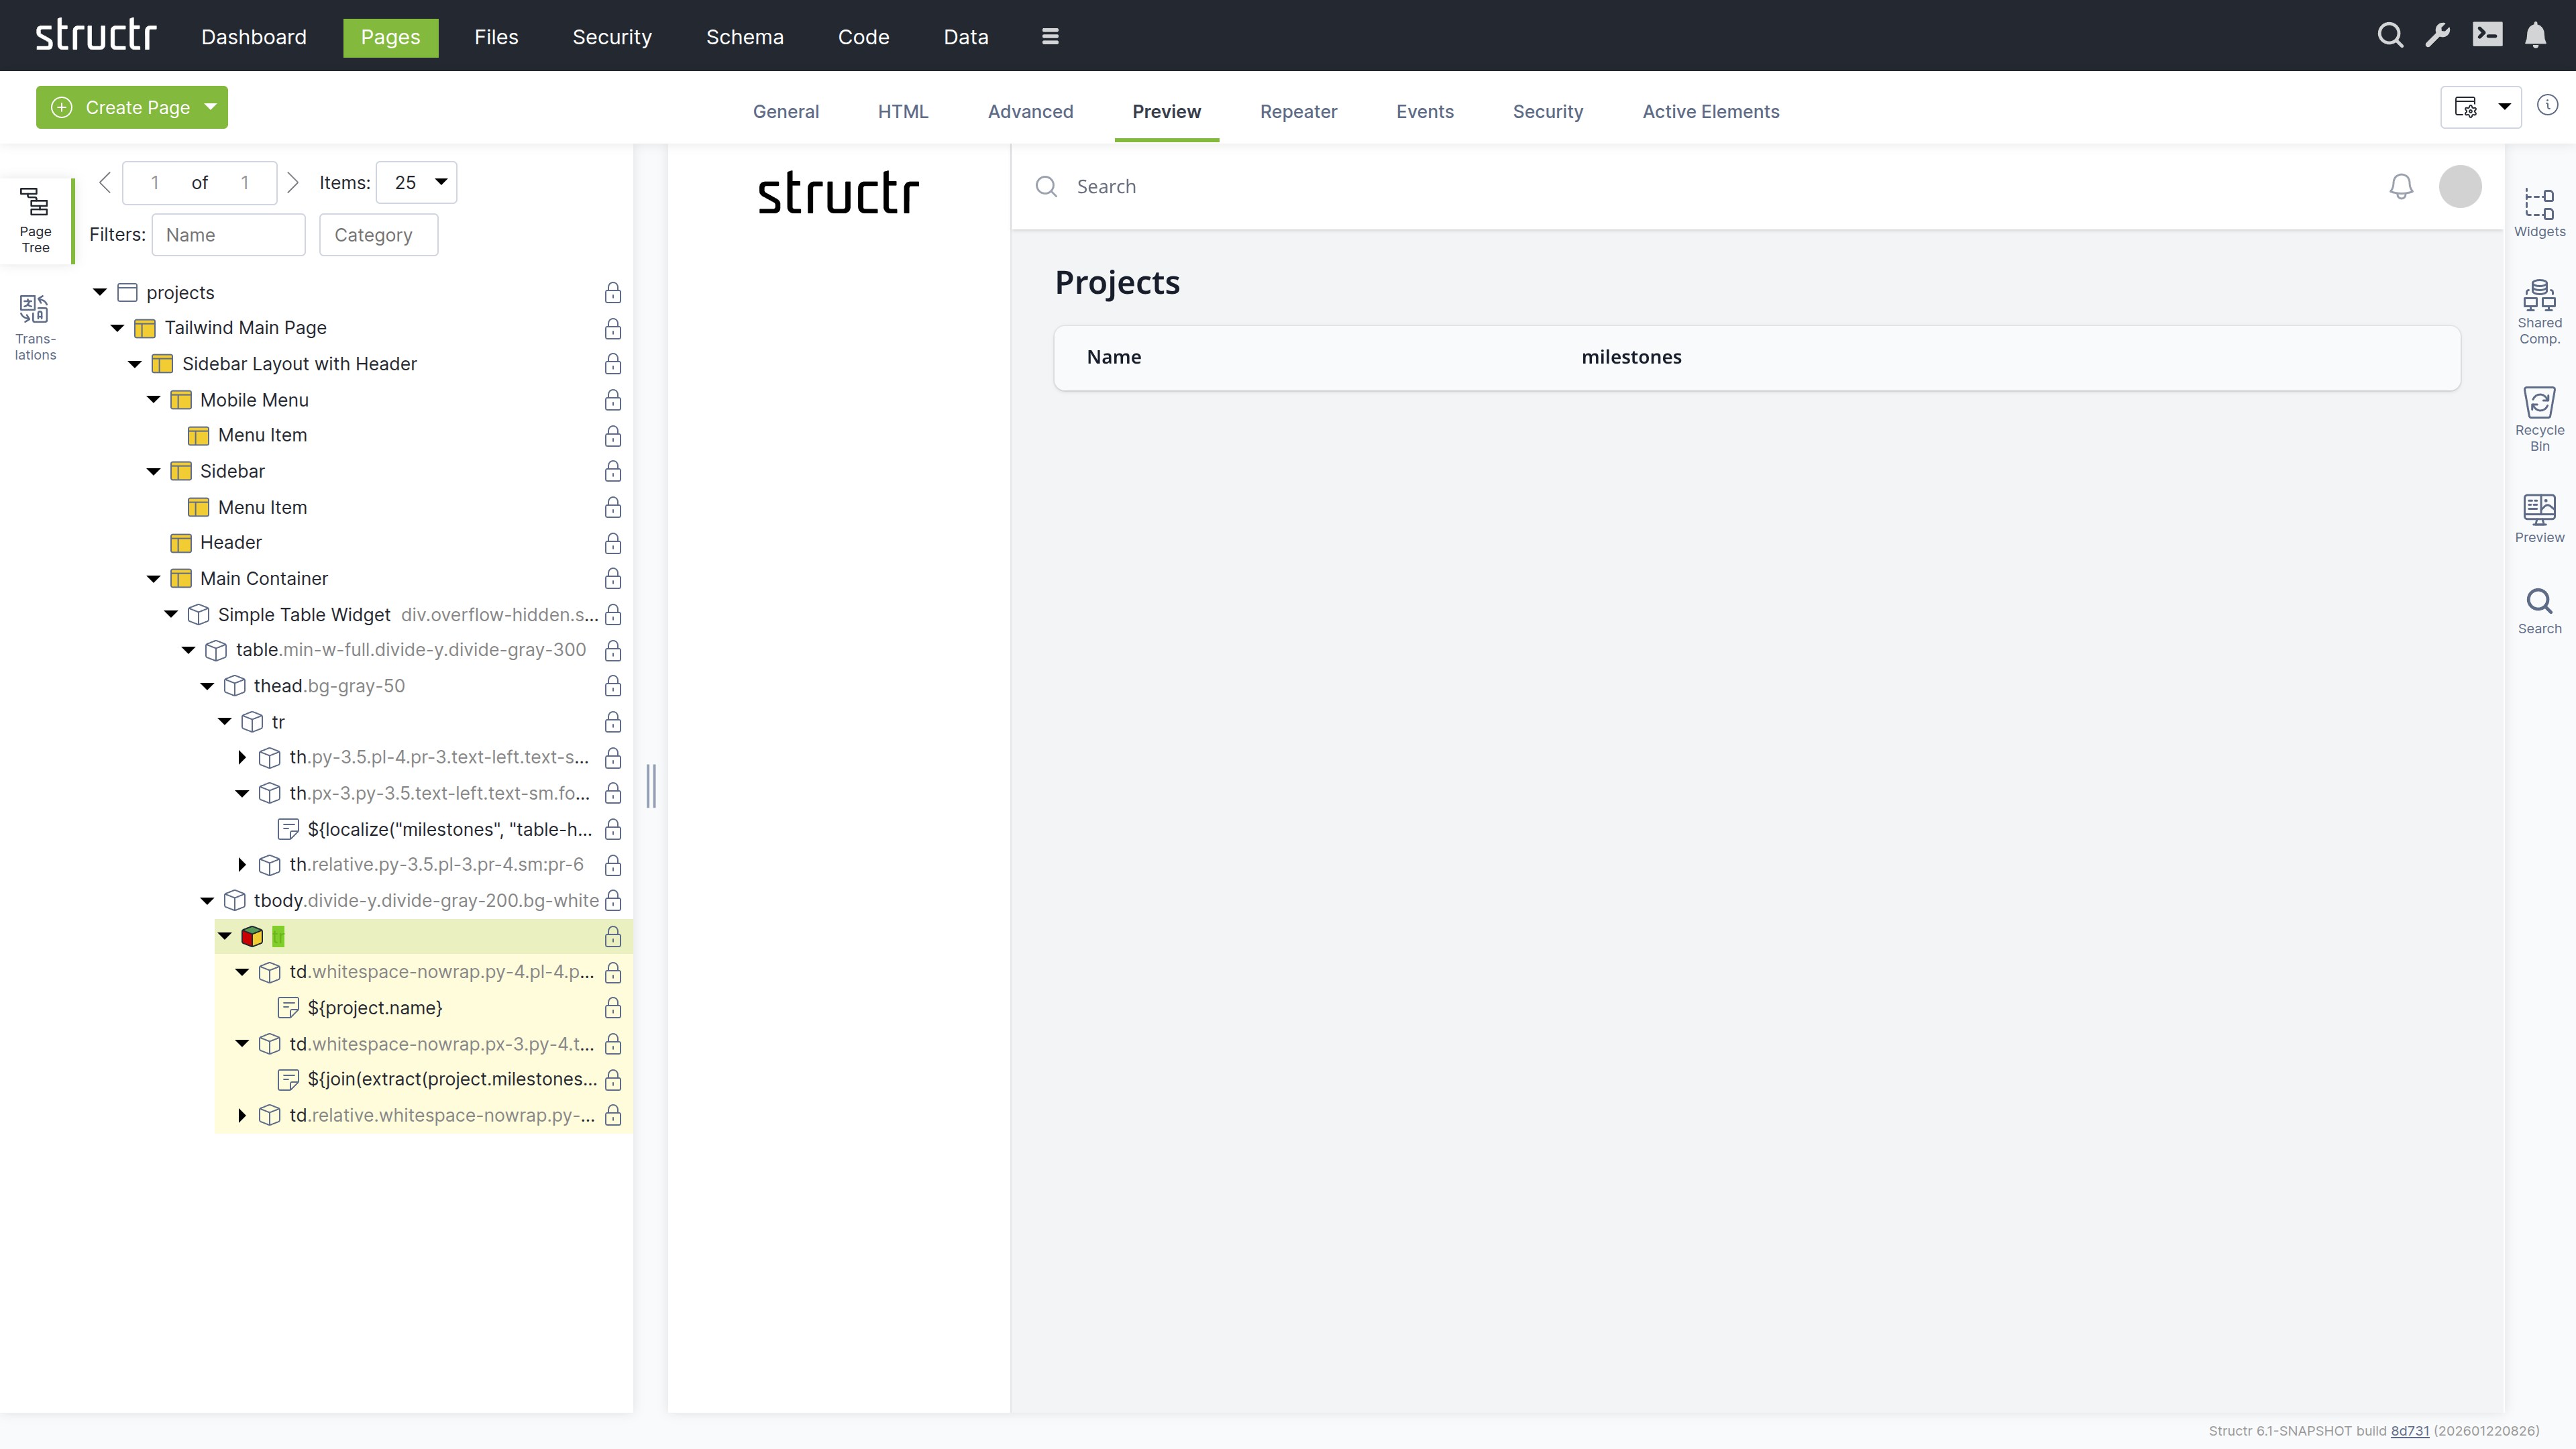
Your page now dynamically displays all projects with their associated milestones. The repeater renders the row once for each project returned by the query, and the data key project makes the current project available to the expressions in the cells.
Chapter 4: Configuring Security
Set up user access controls to secure your project management system.
Creating Users
To create users, navigate to Security via the main menu.
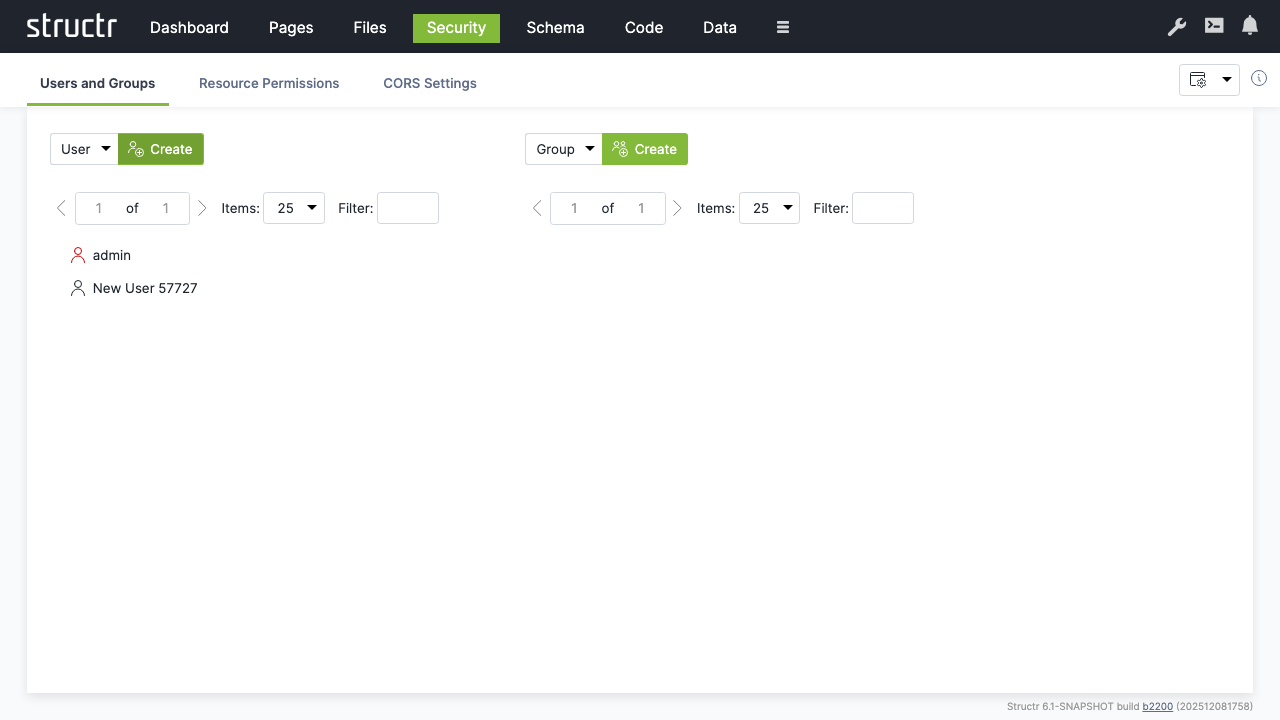
- Make sure “User” is selected and click “Create” to create a new user account
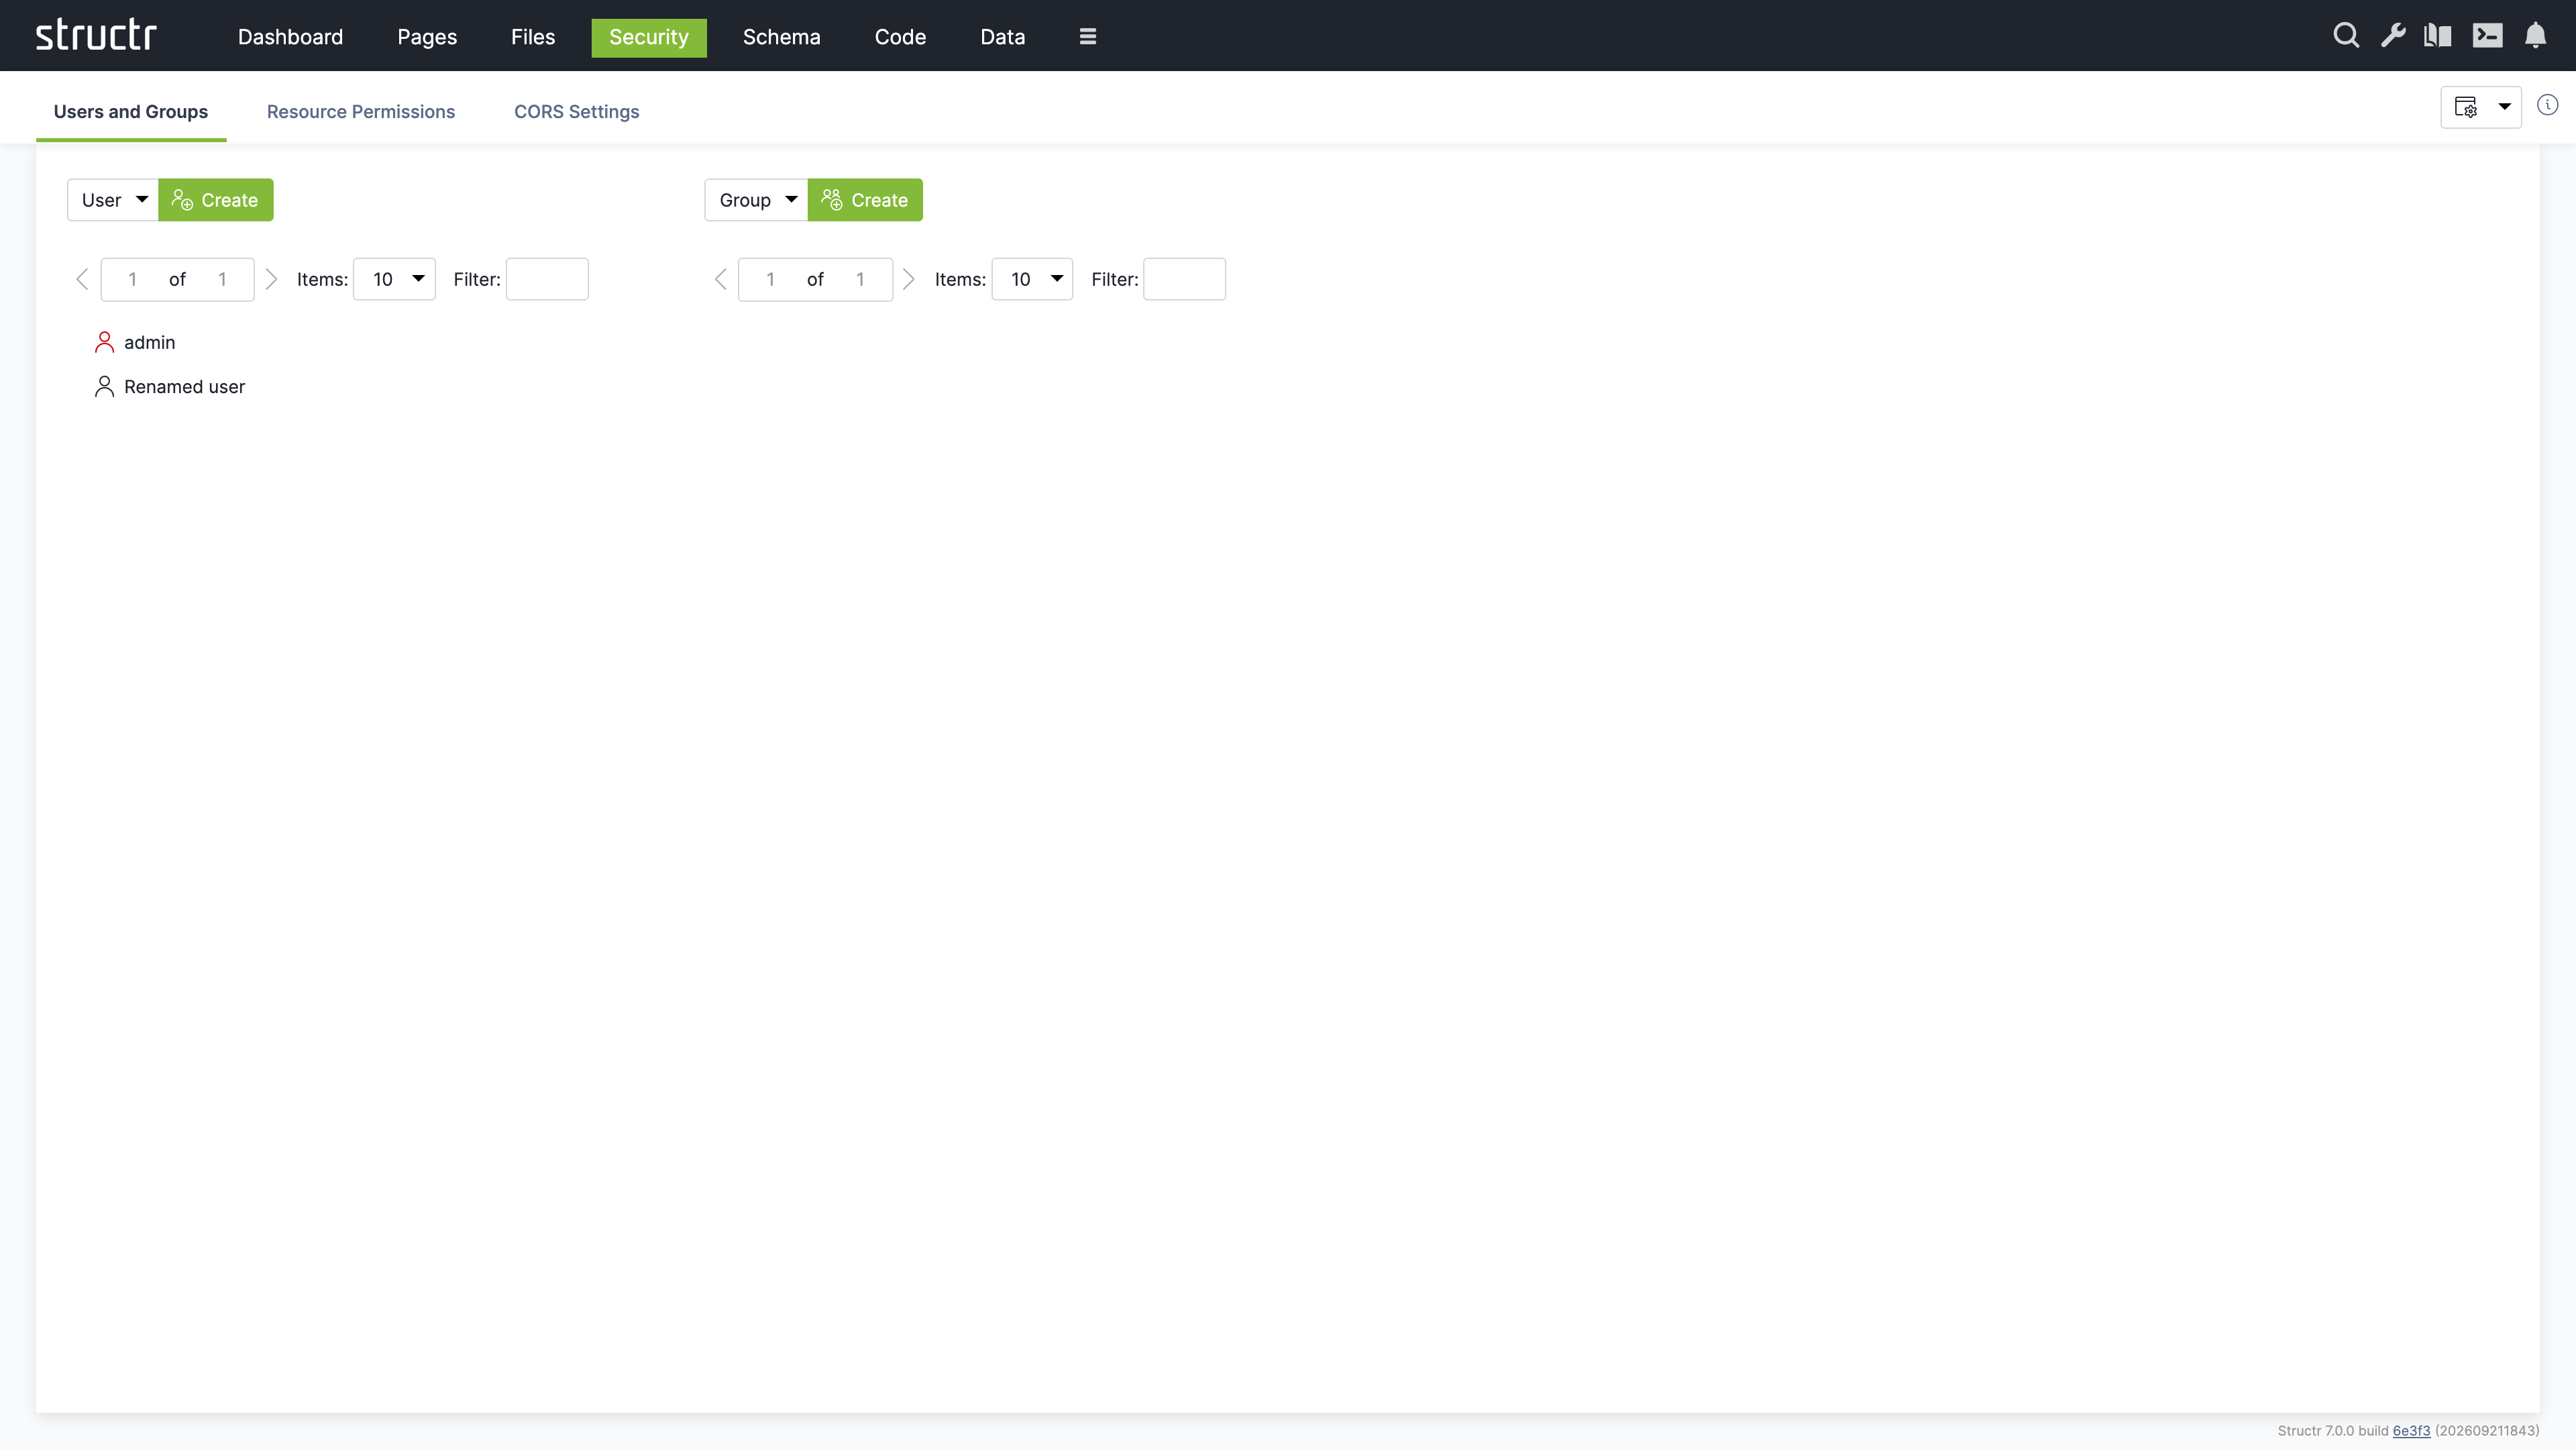
- Rename the user from “New User” to a new user name of your choice
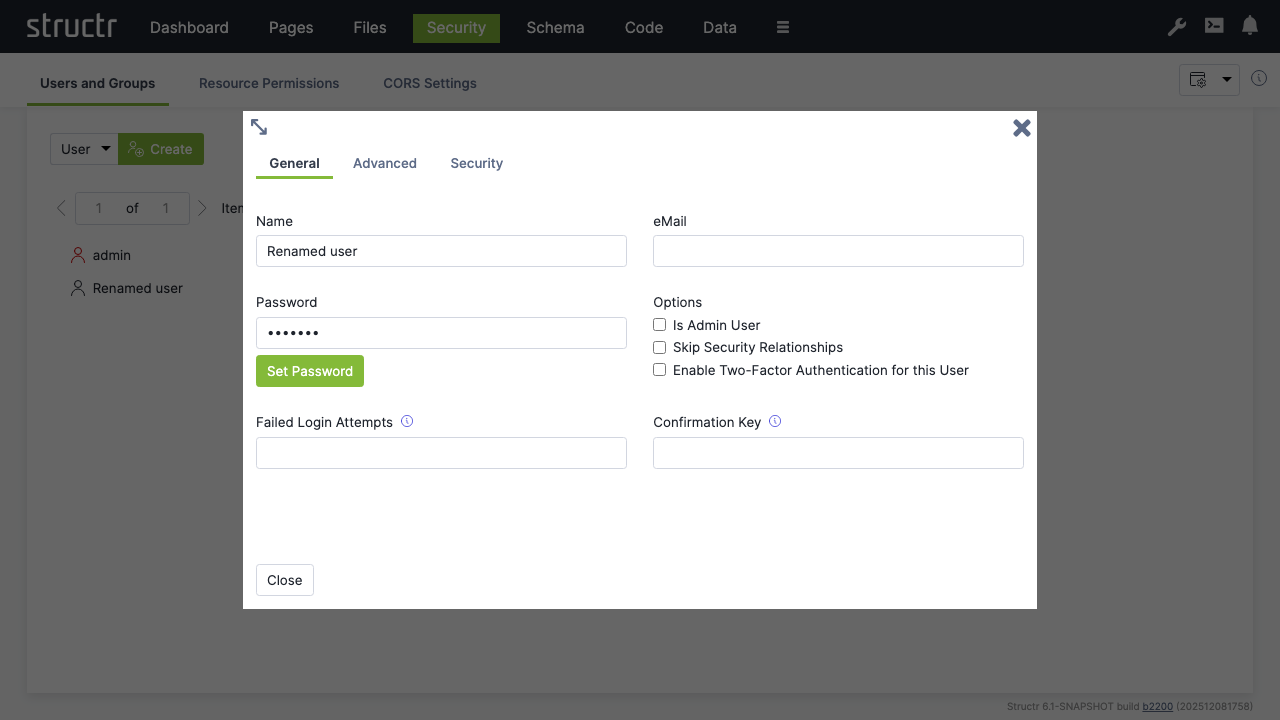
- Right-click the user and select “General”, enter a new password that is difficult to guess into the password field and click “Set Password” to apply it.
Note: We recommend using a password manager to create a good password and to store it securely. Structr is compatible with most password managers.
Creating Groups
- Make sure “Group” is selected and click “Create” to create a user group
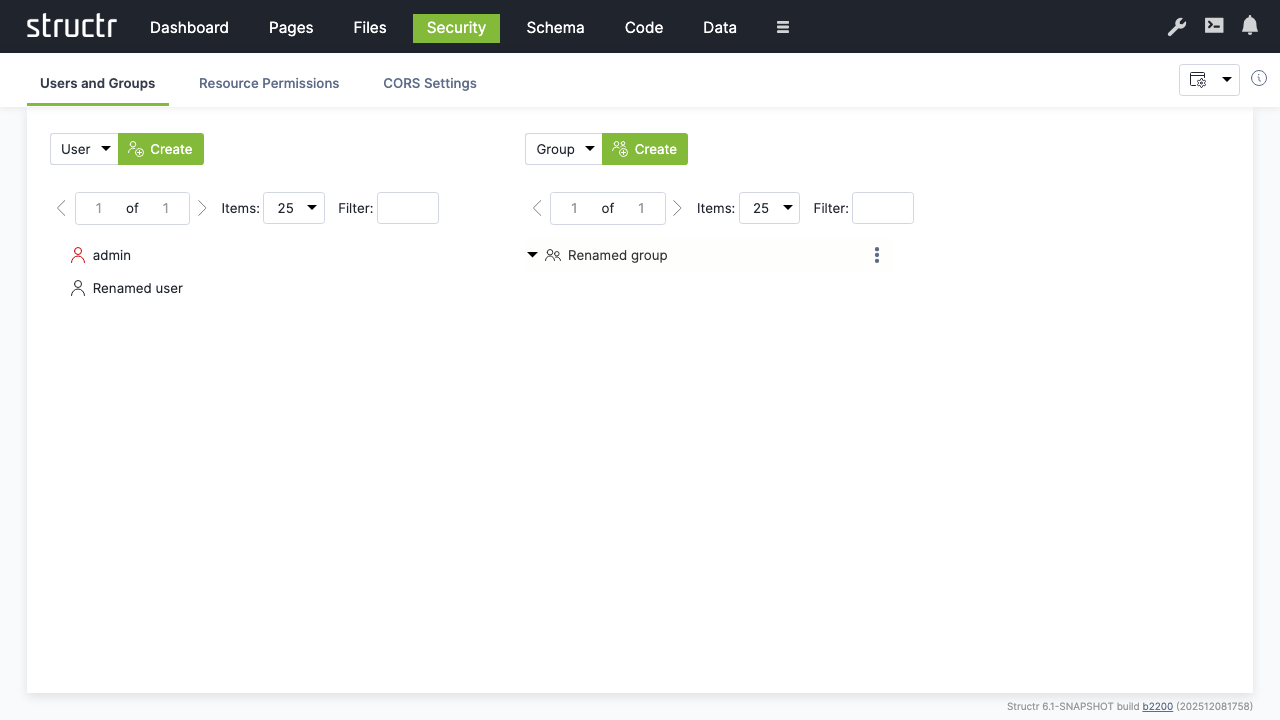
- Rename from “New Group” to a new group name of your choice
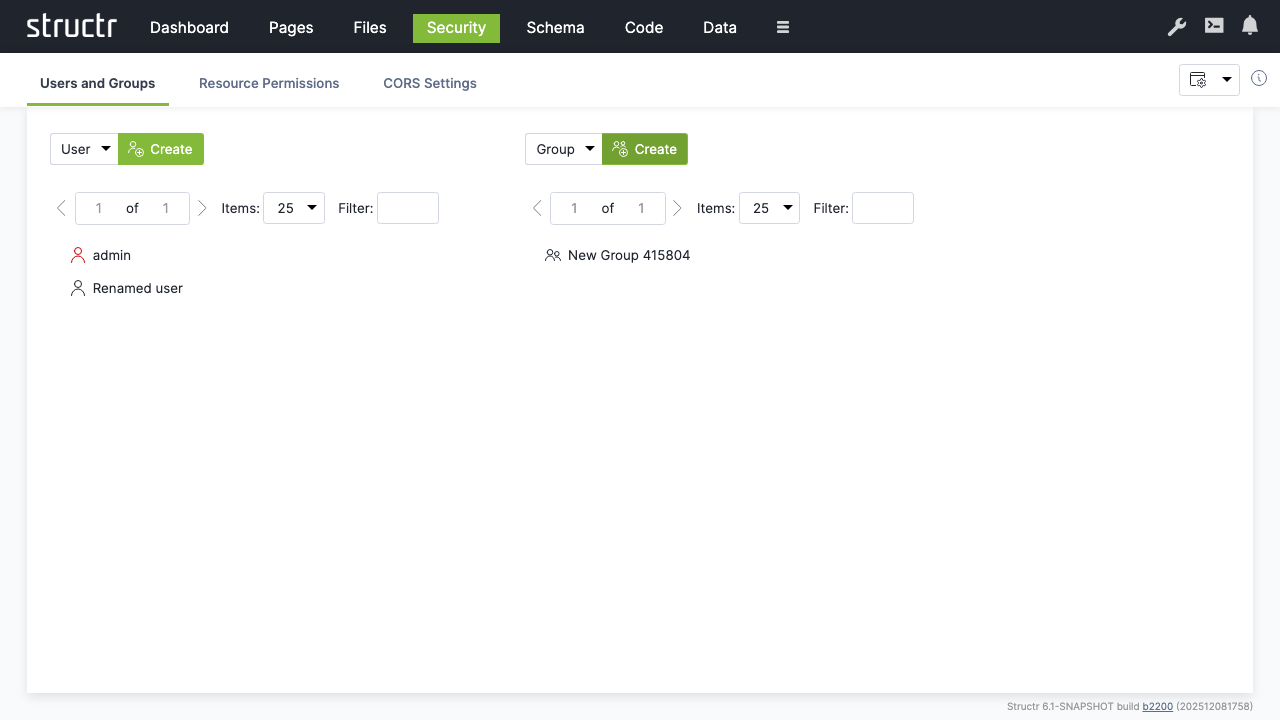
- Drag the user onto the group to add them as a member
Setting Resource Permissions
Grant API access permissions for authenticated users:
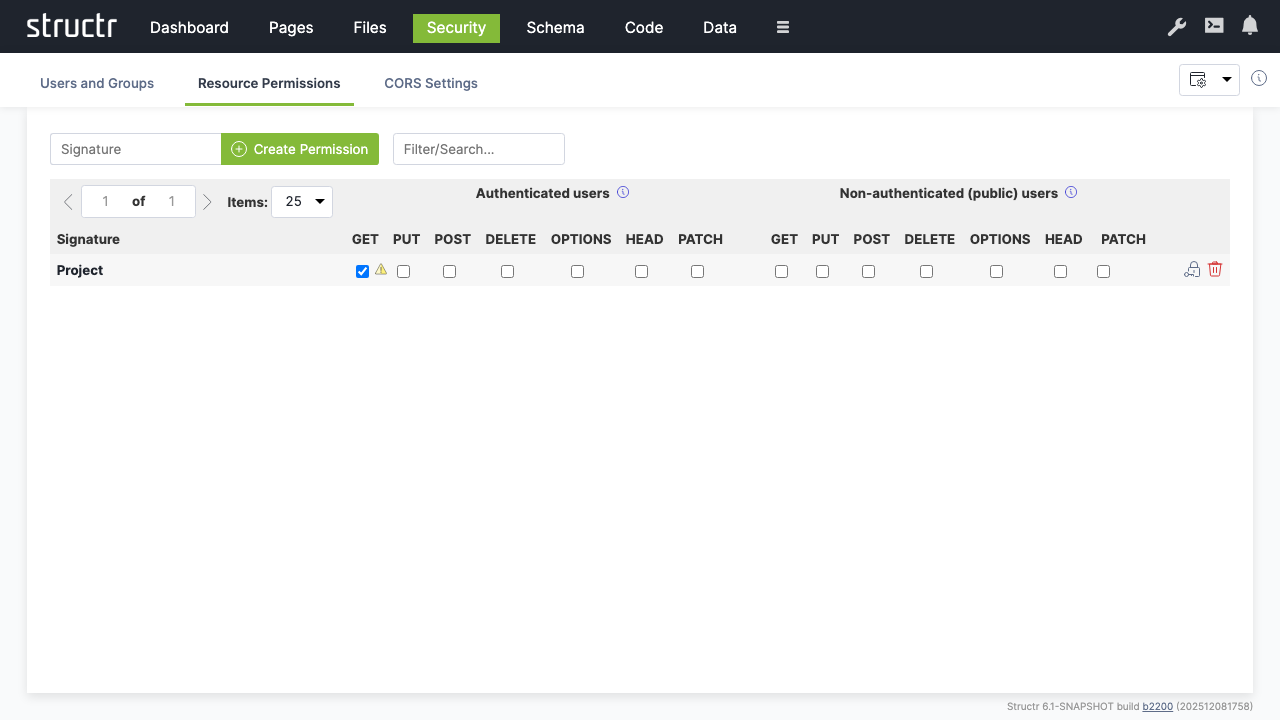
- Switch to the “Resource Access” tab
- Create a permission for “Project” resources
- Enable “GET” for authenticated users to allow them read access to project data
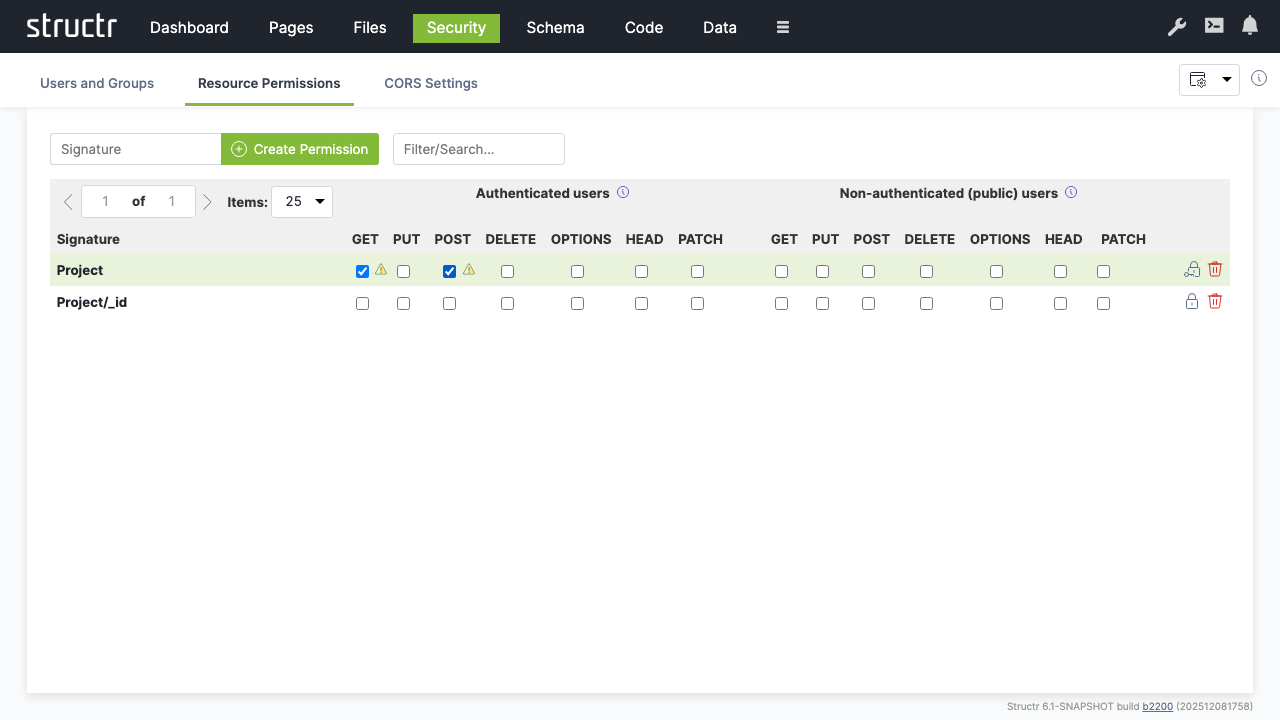
- Enable “POST” on the same “Project” permission to allow authenticated users to create new projects. Creating an object is a POST request to the collection resource “Project”; the entity resource “Project/_id” does not accept POST.
- If users should also update or delete existing projects, create an additional permission for “Project/_id” resources and enable “PUT” and “DELETE” there.
CORS Configuration
Enable cross-origin requests for web applications:
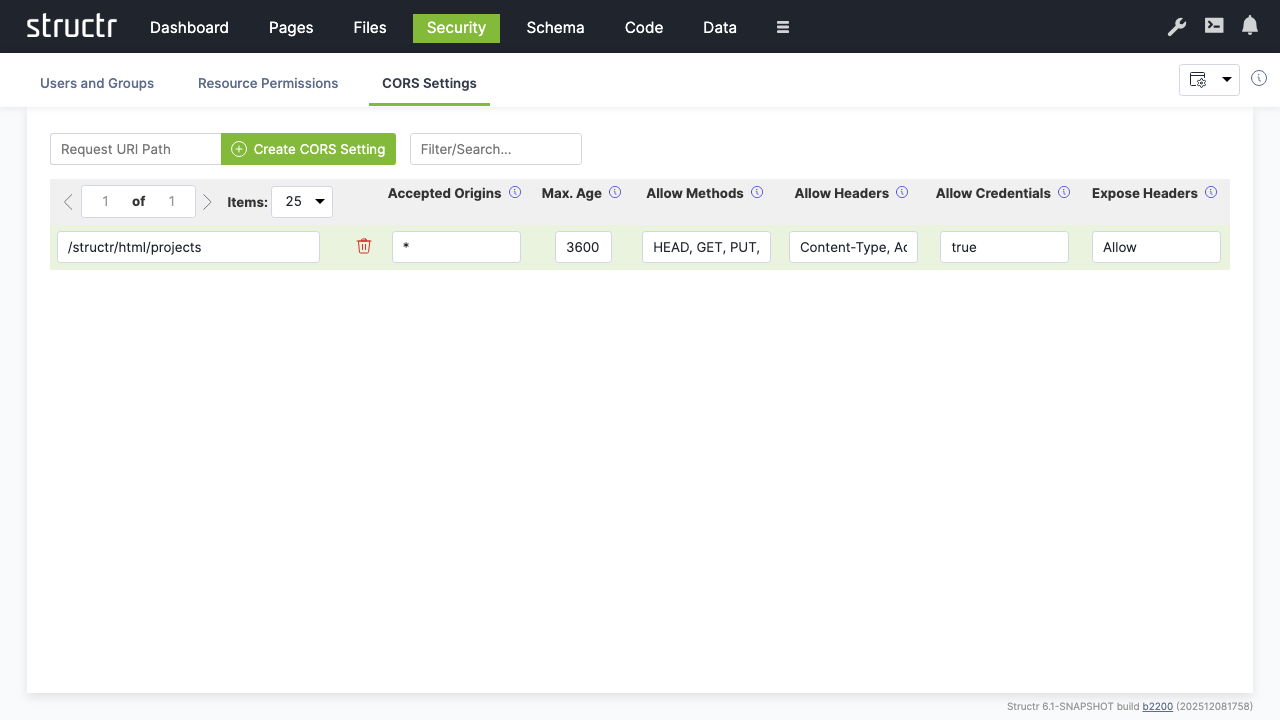
- Switch to “CORS Settings”
- Set request URI to
/structr/html/projects - Configure CORS headers:
- Accepted Origins:
* - Max Age:
3600 - Allow Methods:
HEAD, GET, PUT, POST, OPTIONS - Allow Headers:
Content-Type, Accept - Allow Credentials:
true - Expose Headers:
Allow
Conclusion
You now have a simple project management application with:
- Schema: Defined data types for Projects, Milestones, and Tasks with proper relationships
- Data: Sample data demonstrating the structure and relationships
- Pages: A web interface displaying projects and their milestones
- Security: User authentication, authorization, and API access controls
The application provides a foundation that can be extended with additional features like task management, user assignment, progress tracking, and reporting capabilities.